Kong Plugin
Prerequisites
- A GraphQL endpoint configured for the Kong Gateway with an associated Service and Route.
- Use of Docker or another containerized runtime to run the Kong Gateway.
- An Inigo account setup as documented in our Getting Started guide.
- From #3, An Inigo service token value to set an
INIGO_SERVICE_TOKENenvironment variable. - The Inigo CLI installed and logged in to Inigo.
- A copy of your GraphQL schema file that can be applied using the Inigo CLI.
- A local copy of the
schema.luato configure the custom Inigo plugin.
This documentation assumes that Kong Konnect is used to configure the Kong Gateway (Data Plane Node), but it's not a requirement. If you run Kong standalone, the instructions are the same, just without the Kong Konnect integration.
Apply the GraphQL Schema to Inigo
When using the Kong plugin, the GraphQL schema must be managed by Inigo to take full advantage of the observability, security, and API management functions that Inigo offers. The schema can be configured using the Service configuration, and applied using inigo apply per the documentation. With a published schema, the Inigo plugin will be able to download and apply the latest schema version.
When using the Kong plugin, it's recommended to integrate Inigo into your CI/CD pipeline to automate the schema deployments.
Configure the Custom Inigo Plugin in Kong Konnect
In Kong Konnect, under Plugins, click New Plugin. On the Select a Plugin screen, click the Custom Plugins tab. Click Create to begin the process of creationg the custom Inigo plugin.
As shown in Figure 1, upload the schema.lua in the Upload Schema File field.
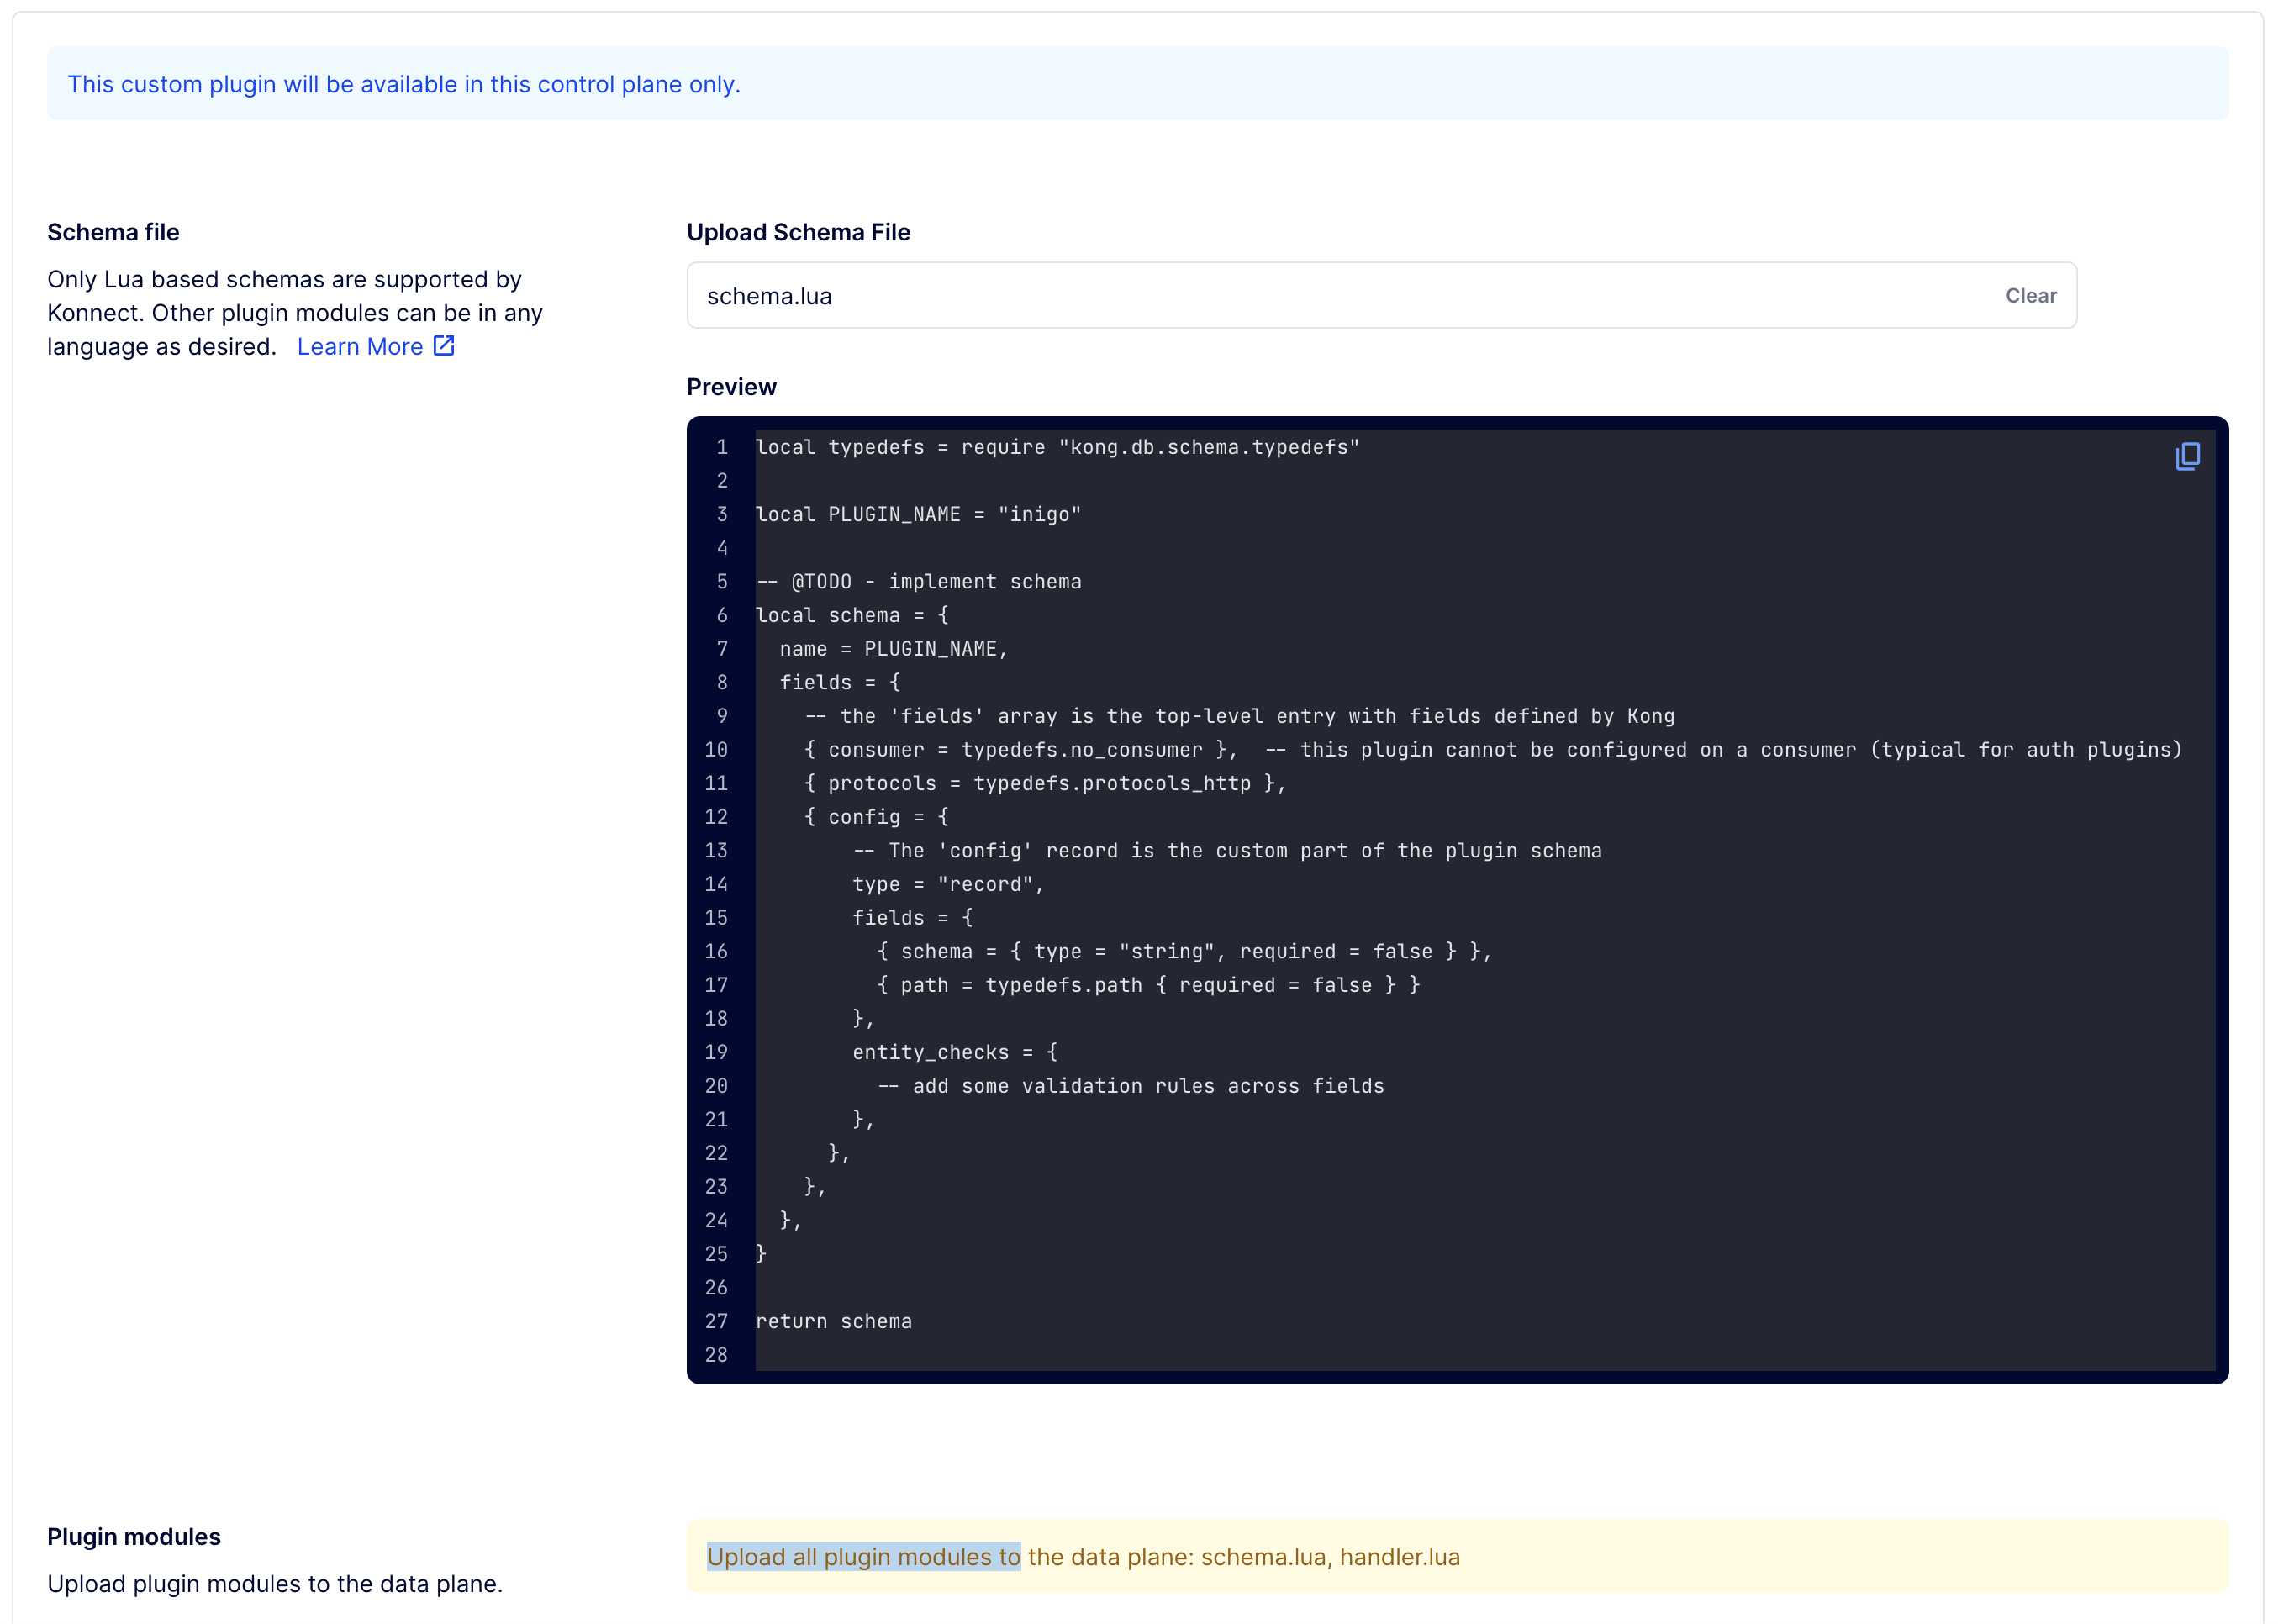
Figure 1. Upload Schema File.
After creating the Inigo plugin, click Enable. Proceed to configure the following, as shown in Figure 2:
- Set the plugin to Scoped.
- Set the Gateway Service and the Route that are configured for your GraphQL endpoint.
- Remove grpc and grpcs from the Protocols.
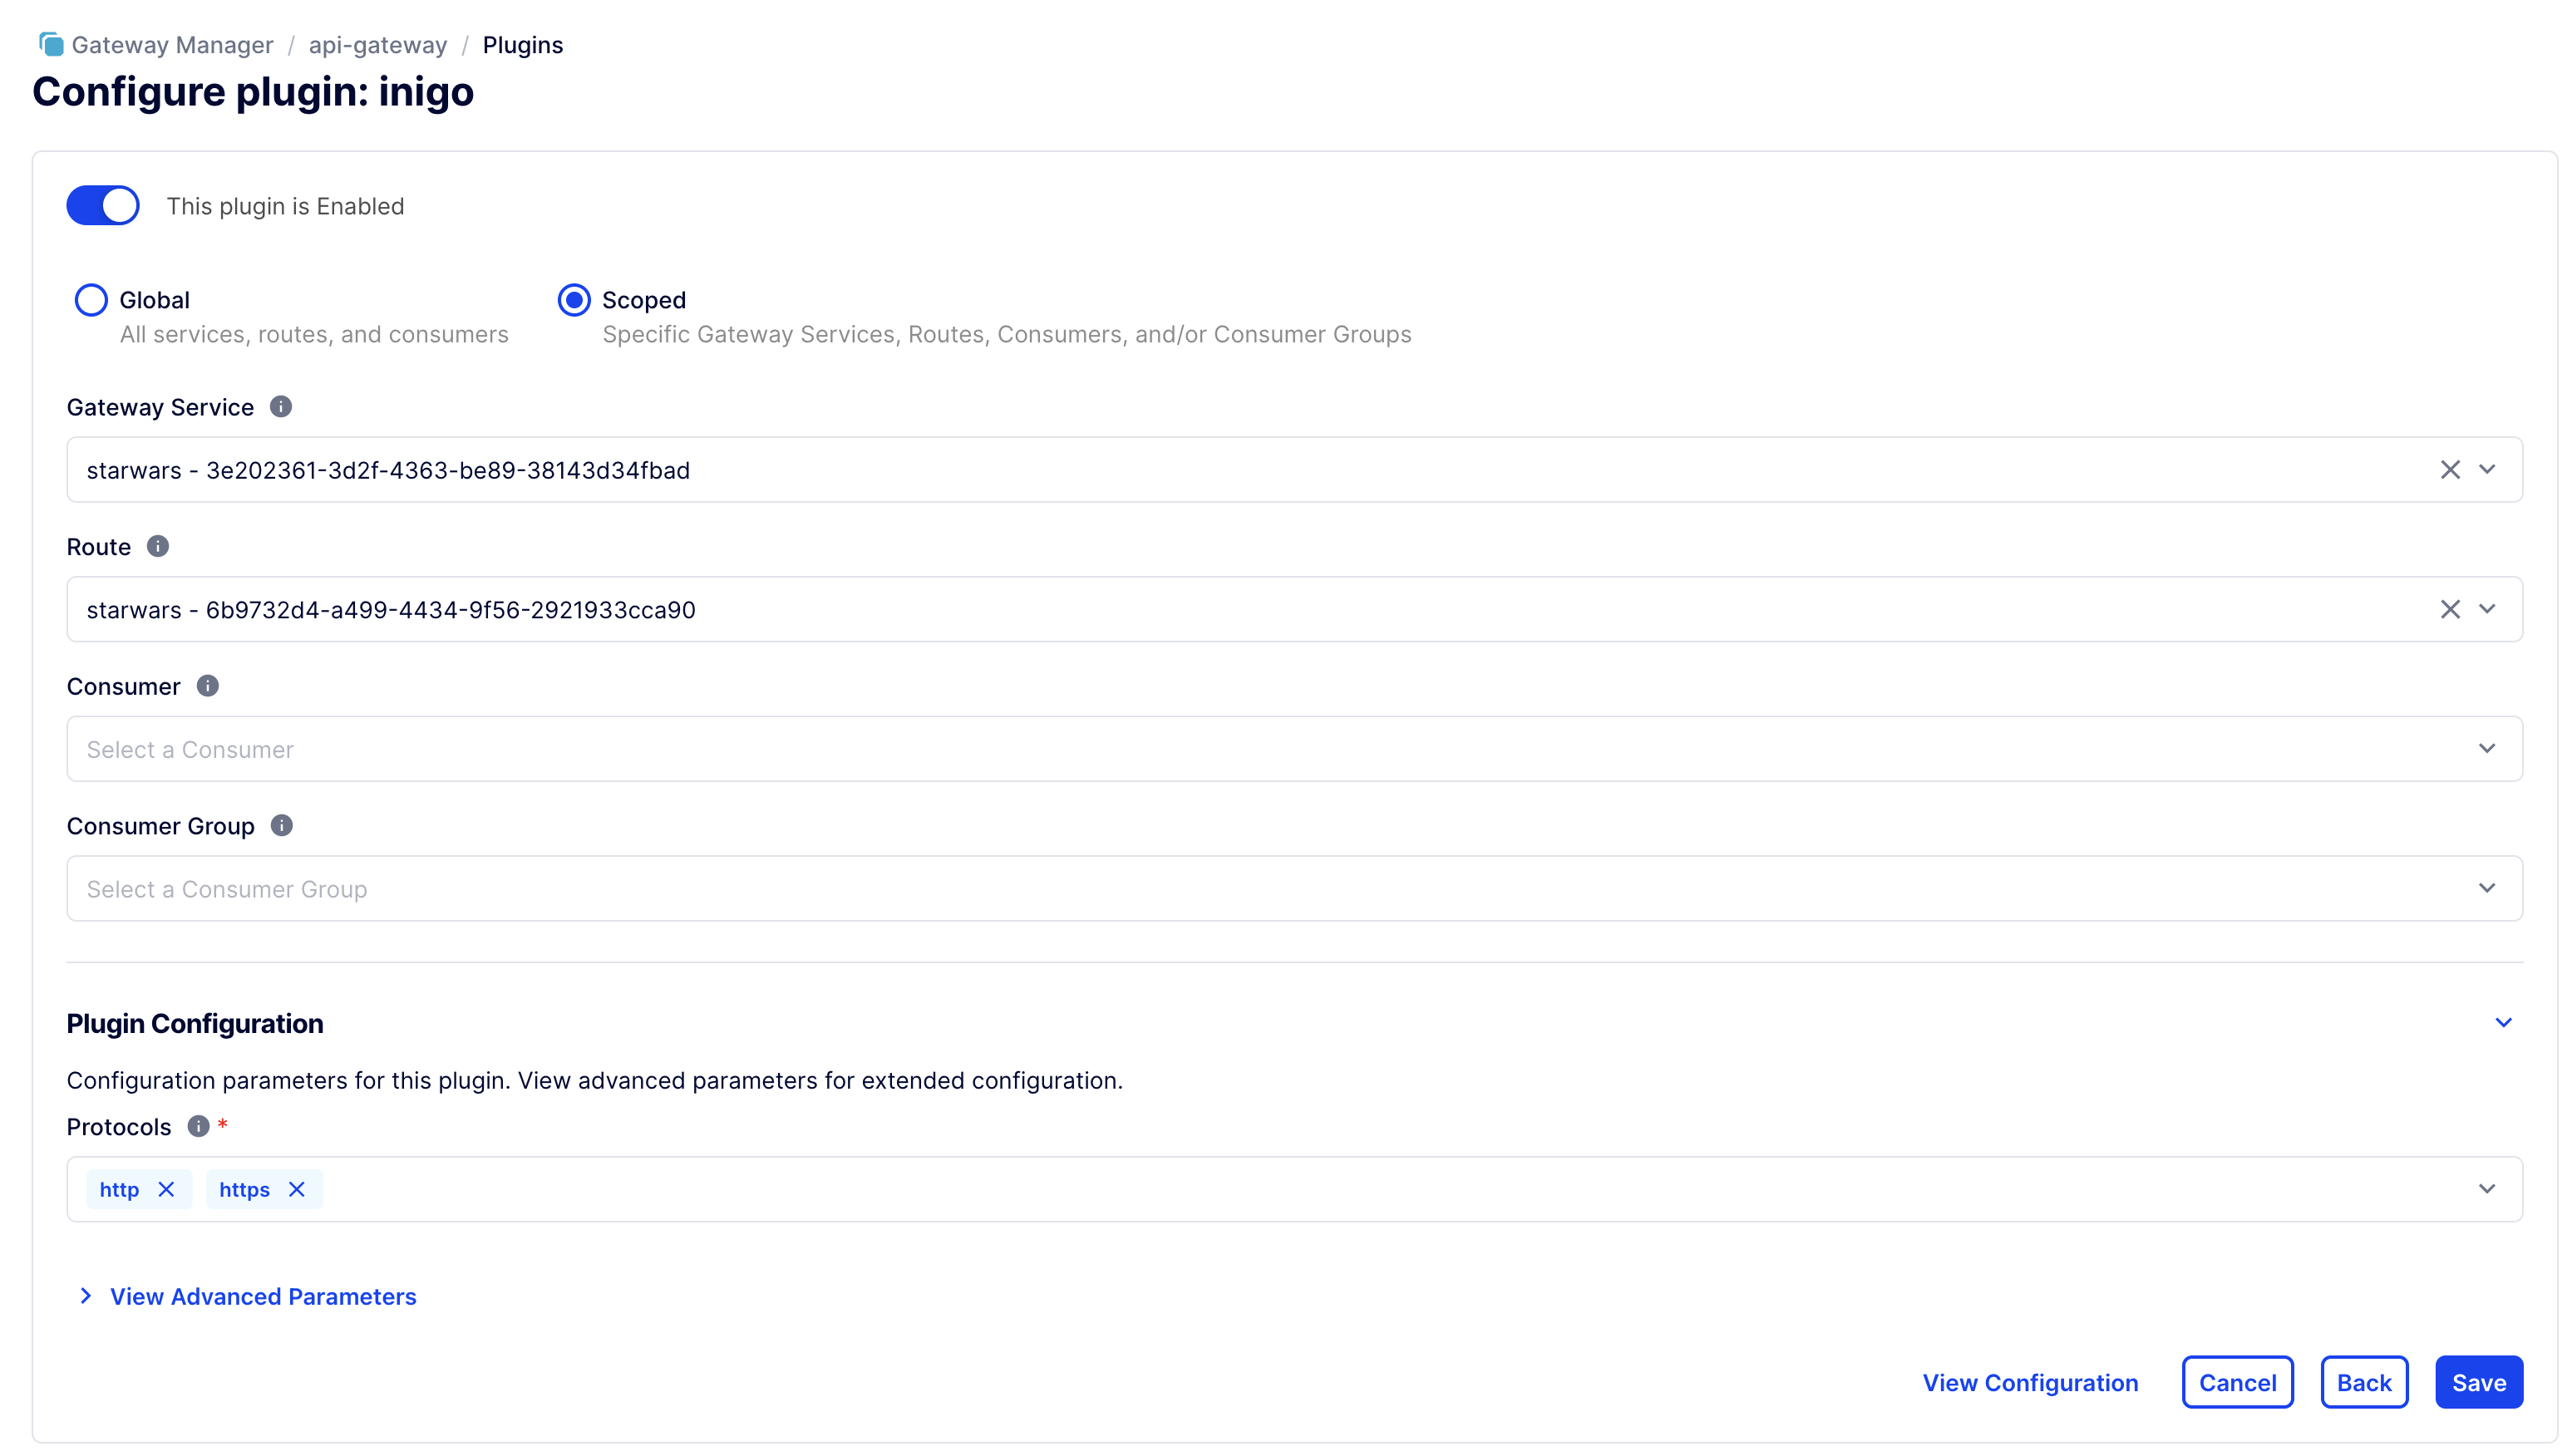
Figure 2. Configure Inigo Plugin.
Configure Inigo Plugin via Kong's Declarative Configuration (alternative approach)
Add Inigo plugin to the desired route in Kong's yaml configuration file like in the example below:
services:
  - name: starwars
    url: http://starwars:8888/query
    routes:
      - name: starwars
        paths:
          - /query
    plugins:
      - name: inigo
Run the Kong Gateway With the Inigo Plugin
Inigo provides a prebuilt container image of the Kong Gateway with the Inigo plugin preinstalled. The image can be pulled from inigolabs/inigo_kong. Replace the default Kong Gateway image with inigohub/inigo_kong and also add the INIGO_SERVICE_TOKEN to the docker run command, as shown in the following example:
docker run -d \
-e "KONG_ROLE=data_plane" \
-e "KONG_DATABASE=off" \
-e "KONG_VITALS=off" \
-e "KONG_CLUSTER_MTLS=pki" \
-e "KONG_CLUSTER_CONTROL_PLANE=...konghq.com:443" \
-e "KONG_CLUSTER_SERVER_NAME=...konghq.com" \
-e "KONG_CLUSTER_TELEMETRY_ENDPOINT=...konghq.com:443" \
-e "KONG_CLUSTER_TELEMETRY_SERVER_NAME=...konghq.com" \
-e "KONG_CLUSTER_CERT=-----BEGIN CERTIFICATE-----
...
-----END CERTIFICATE-----" \
-e "KONG_CLUSTER_CERT_KEY=-----BEGIN PRIVATE KEY-----
...
-----END PRIVATE KEY-----" \
-e "KONG_LUA_SSL_TRUSTED_CERTIFICATE=system" \
-e "KONG_KONNECT_MODE=on" \
-e "INIGO_SERVICE_TOKEN=ey..." \
-p 8000:8000 \
-p 8443:8443 \
inigohub/inigo_kong
After starting the Kong Gateway, the Inigo agent, embedded in the Inigo Kong plugin, will connect back to Inigo's cloud service. Inigo will now capture metrics and enforce configured security and access policies for queries running through the Kong Gateway.
Common issues
- Issue: Route with Inigo plugin on it responds with
instance handle not found.
Explanation: There was an issue during Inigo plugin initialization. The exact error message is printed in logs. The first thing to make sure is thatINIGO_SERVICE_TOKENenv var is provided.