Google Cloud Apigee
Prerequisites
- A GraphQL route configured for the Apigee with flowing traffic to a GraphQL server.
- An Inigo account setup as documented in our Getting Started guide.
- From #2, An Inigo service token value to set an
INIGO_SERVICE_TOKENenvironment variable.
Inigo's Apigee integration uses Apigee's ExternalCallout Policy to process GraphQL requests coming through Apigee's API Proxy. The Inigo agent will then apply Inigo's observability and security features for your GraphQL API that is proxied through Apigee.
Apply the GraphQL Schema to Inigo
When using the Apigee agent integeration, the GraphQL schema must be managed by Inigo to take full advantage of the observability, security, and API management functions that Inigo offers. The schema can be configured using the Service configuration, and applied using inigo apply per the documentation. With a published schema, the Inigo plugin will be able to download and apply the latest schema version.
When using the Apigee agent integration, it's recommended to integrate Inigo into your CI/CD pipeline to automate the schema deployments.
Deploy Inigo Apigee Agent in Cloud Run
An inigohub/inigo_apigee_agent Inigo agent container image is available specifically for use as an ExternalCallout. It's recommended to deploy the agent in Google Cloud Run, as shown in Figure 1.
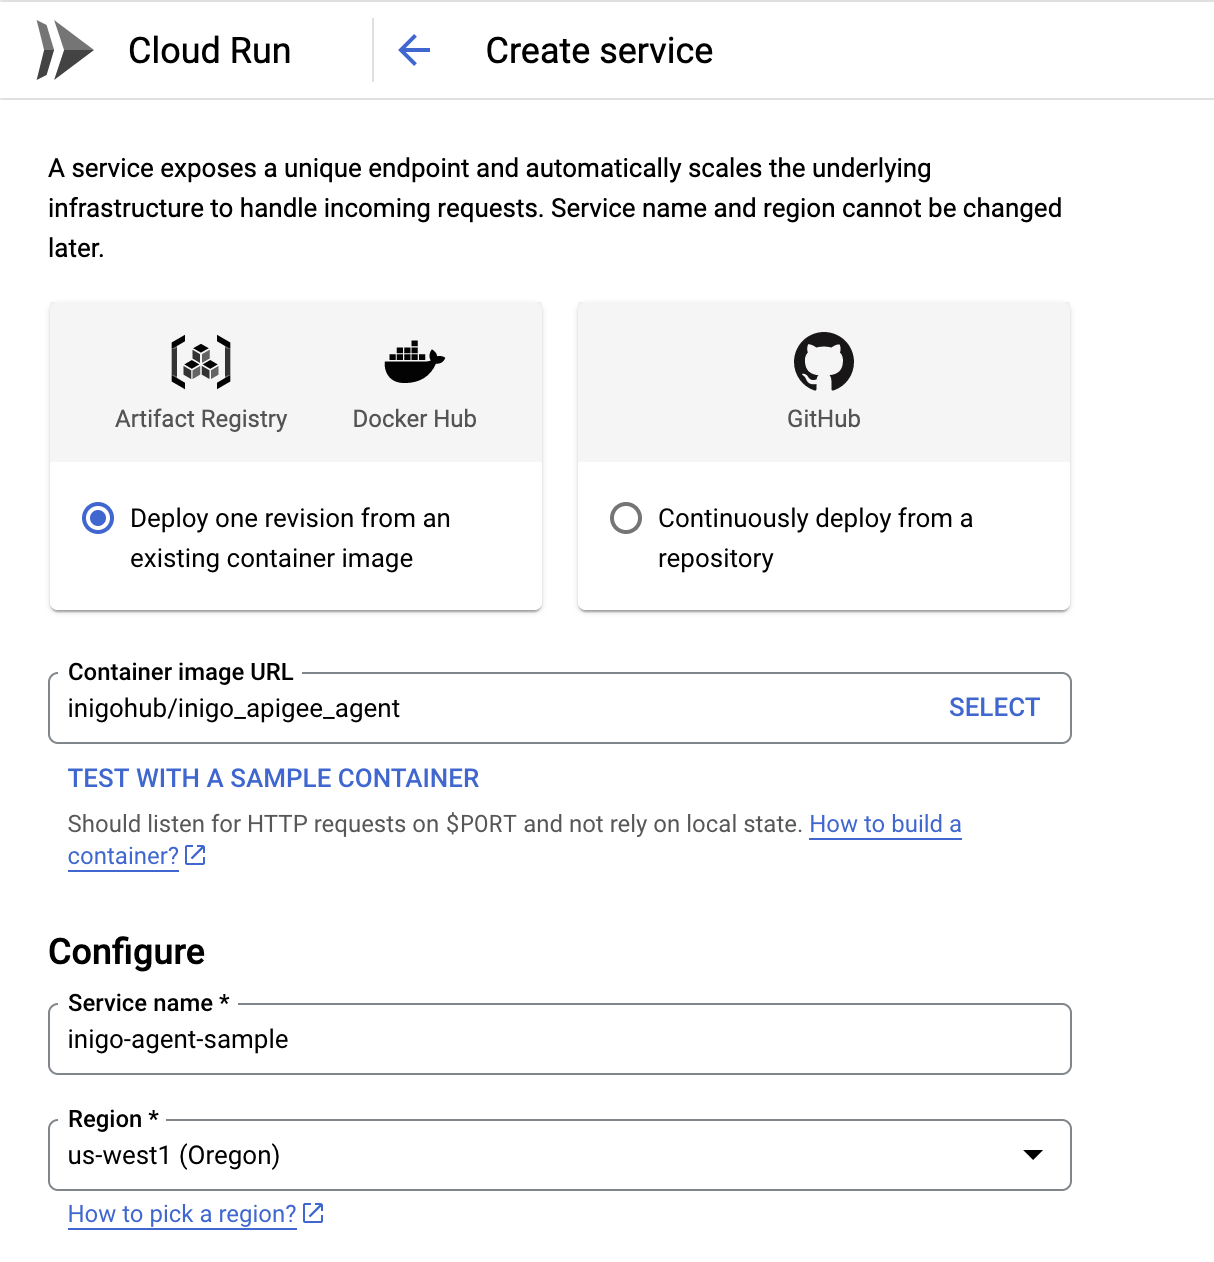
Use the INIGO_SERVICE_TOKEN as an environment variable when configuring the Cloud Run service.
The Container port is 8080 and the default Google Cloud Run settings are sufficient to get started. After deployment, a run.app URL will be generated that is running on port 443 and will be used to configure the ExternalCallout.
Set Up Target Server for Inigo Agent
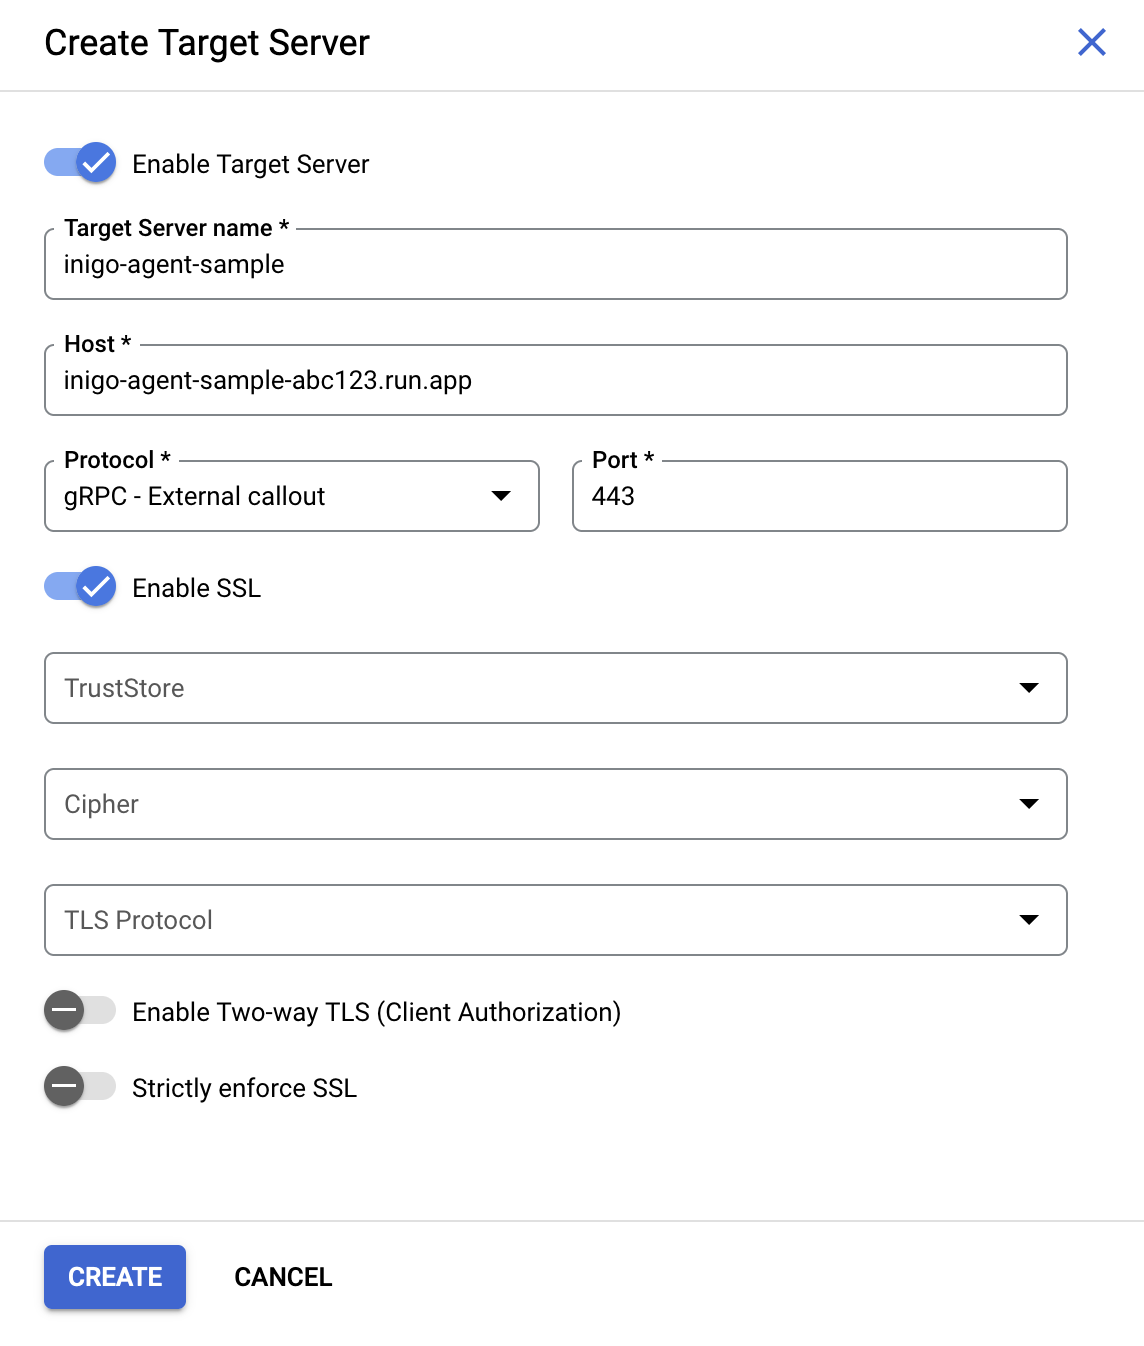
In Apigee, under Management -> Environments -> Target Servers click Create Target Server. Enter a unique Target Server name and a Host URL for your Cloud Run Inigo Agent URL. Set the Protocol to be gRPC - External callout with a Port of 443, as shown in Figure 2.
Set Up the ExternalCallout Policy
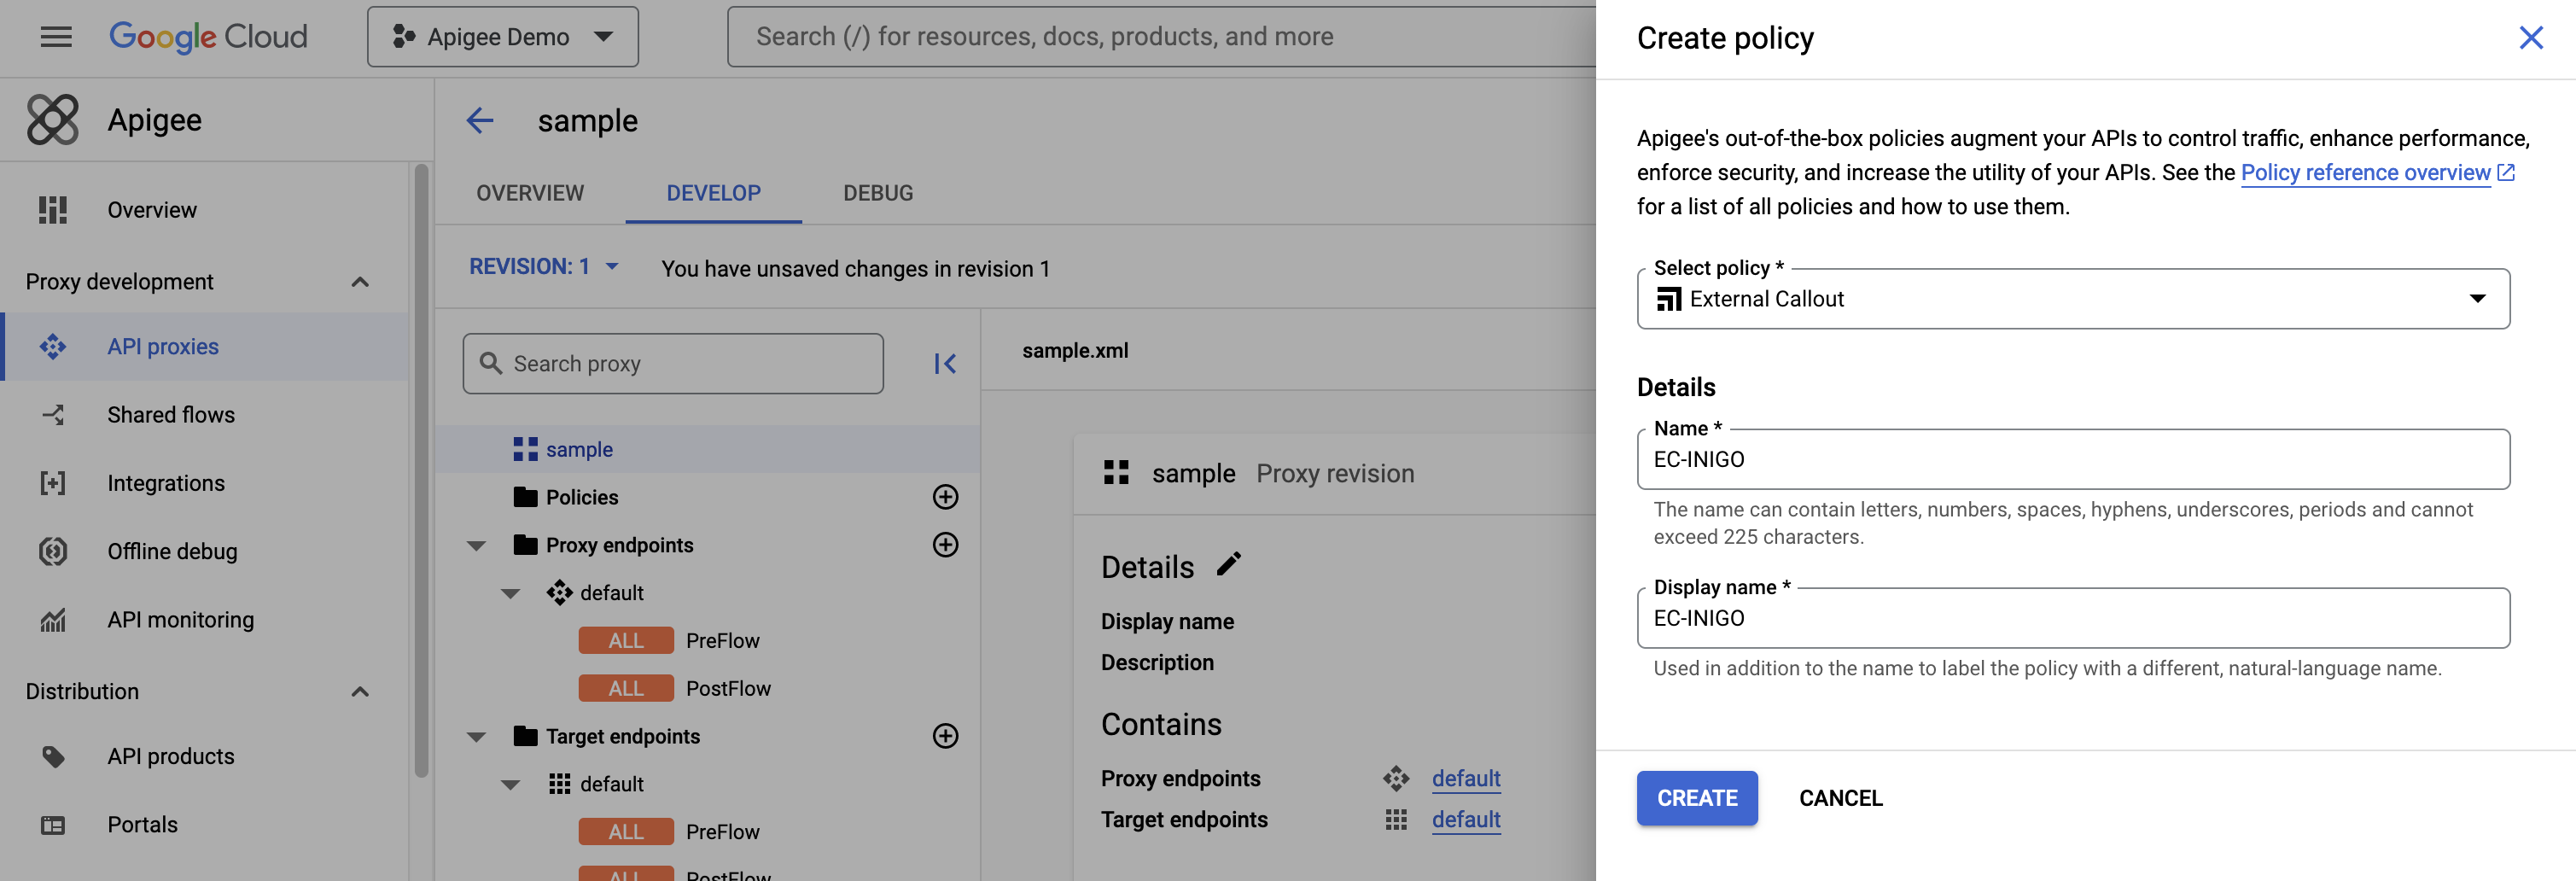
Under API proxies -> Proxy -> DEVELOP click the + button next to Policies. Next, create an EC-INIGO policy of type External Callout, as shown in Figure 3.
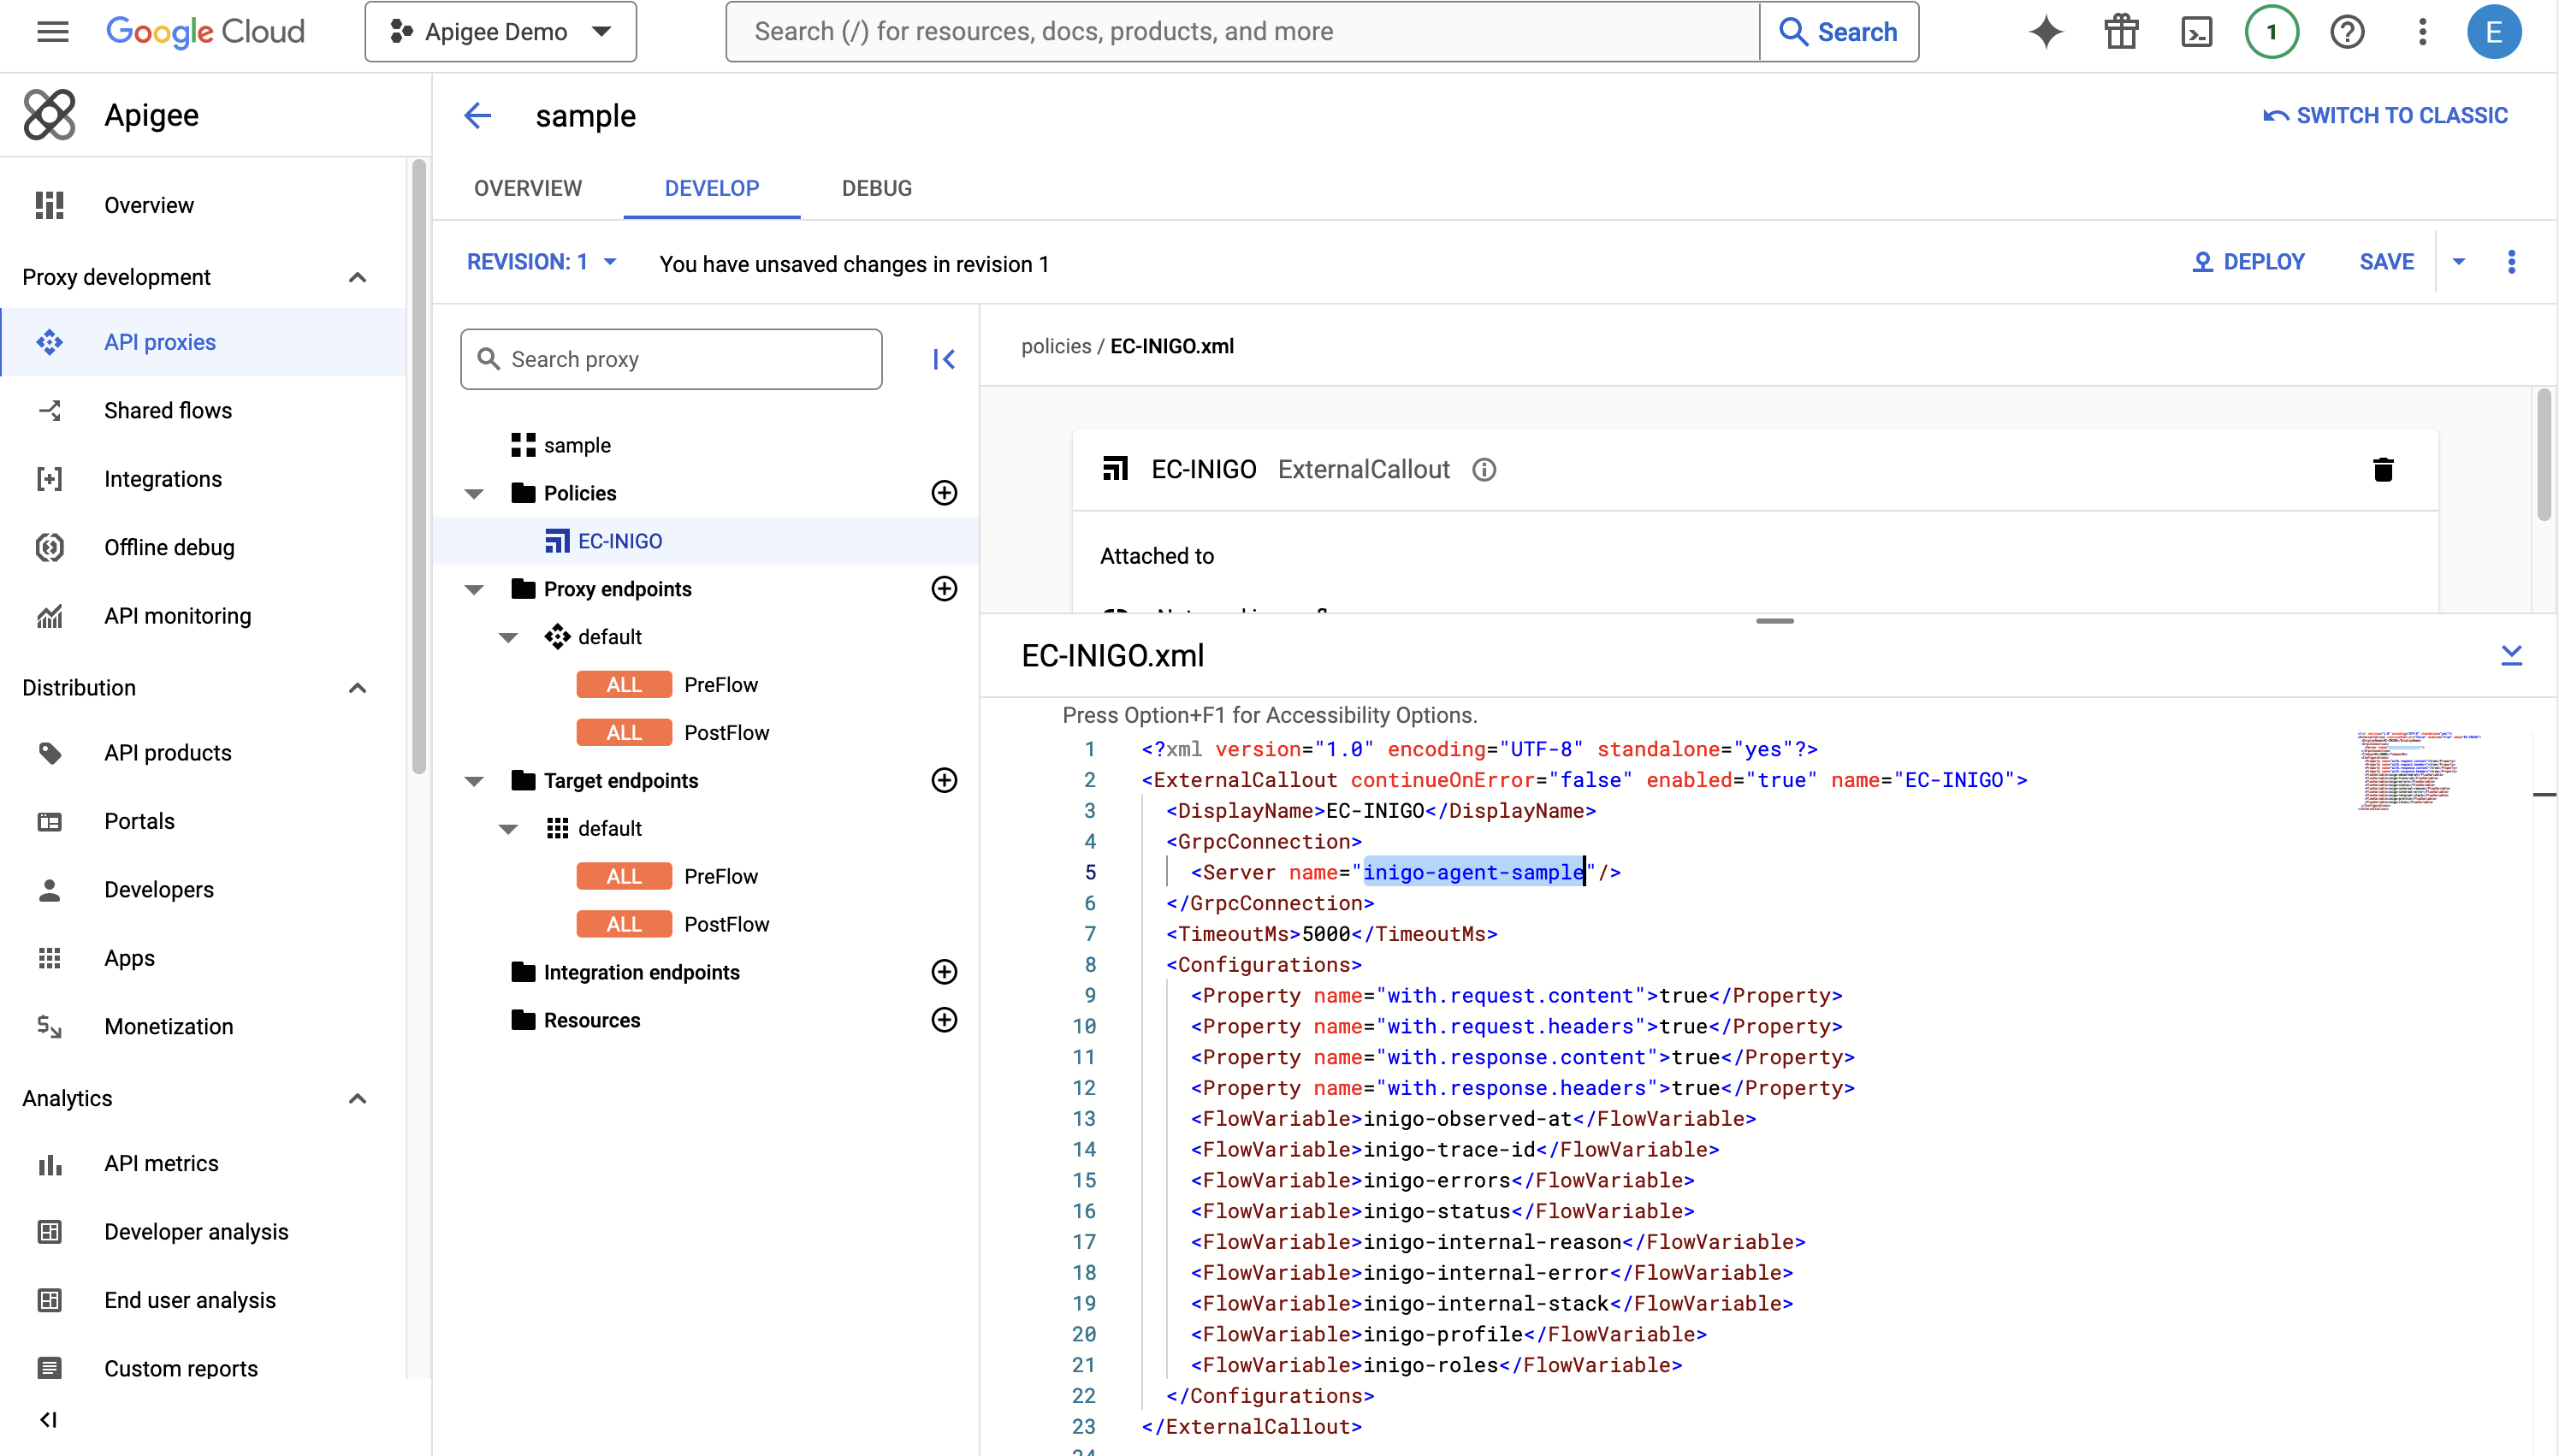
Next, the ExternalCallout XML must be set. The following is a sample XML that can be modified for your <Server name= from the Target Server (see above):
<?xml version="1.0" encoding="UTF-8" standalone="yes"?>
<ExternalCallout continueOnError="false" enabled="true" name="EC-INIGO">
  <DisplayName>EC-INIGO</DisplayName>
  <GrpcConnection>
    <Server name="inigo-agent"/>
  </GrpcConnection>
  <TimeoutMs>5000</TimeoutMs>
  <Configurations>
    <Property name="with.request.content">true</Property>
    <Property name="with.request.headers">true</Property>
    <Property name="with.response.content">true</Property>
    <Property name="with.response.headers">true</Property>
    <FlowVariable>inigo-observed-at</FlowVariable>
    <FlowVariable>inigo-trace-id</FlowVariable>
    <FlowVariable>inigo-request-size</FlowVariable>
    <FlowVariable>inigo-request-hash</FlowVariable>
    <FlowVariable>inigo-errors</FlowVariable>
    <FlowVariable>inigo-status</FlowVariable>
    <FlowVariable>inigo-internal-reason</FlowVariable>
    <FlowVariable>inigo-internal-error</FlowVariable>
    <FlowVariable>inigo-internal-stack</FlowVariable>
    <FlowVariable>inigo-profile</FlowVariable>
    <FlowVariable>inigo-roles</FlowVariable>
    <FlowVariable>inigo-include-input</FlowVariable>
    <FlowVariable>inigo-extensions</FlowVariable>
    <FlowVariable>inigo-is-request-modified</FlowVariable>
    <FlowVariable>inigo-original-request</FlowVariable>
  </Configurations>
</ExternalCallout>
After setting the XML for the ExternalCallout, click Save and then click Deploy, as shown in Figure 4.
Add a RaiseFault
Next, click Add for the PreFlow. Create a RaiseFault with the following XML:
<?xml version="1.0" encoding="UTF-8" standalone="yes"?>
<RaiseFault continueOnError="false" enabled="true" name="RF-INIGO-GUARD">
  <DisplayName>RF-INIGO-GUARD</DisplayName>
  <Properties/>
  <FaultResponse>
    <Set>
      <Headers/>
      <Payload contentType="application/json">{inigo-response}</Payload>
      <StatusCode>200</StatusCode>
    </Set>
  </FaultResponse>
  <IgnoreUnresolvedVariables>true</IgnoreUnresolvedVariables>
</RaiseFault>
Click Save again and then Edit the PreFlow XML to add inigo-has-response=true <Condition> for RF-INIGO-GUARD as follows:
<PreFlow name="PreFlow">
<Request>
<Step>
<Name>EC-INIGO</Name>
</Step>
<Step>
<Name>RF-INIGO-GUARD</Name>
<Condition>inigo-has-response=true</Condition> <!-- Add this Condition to the PreFlow -->
</Step>
</Request>
<Response/>
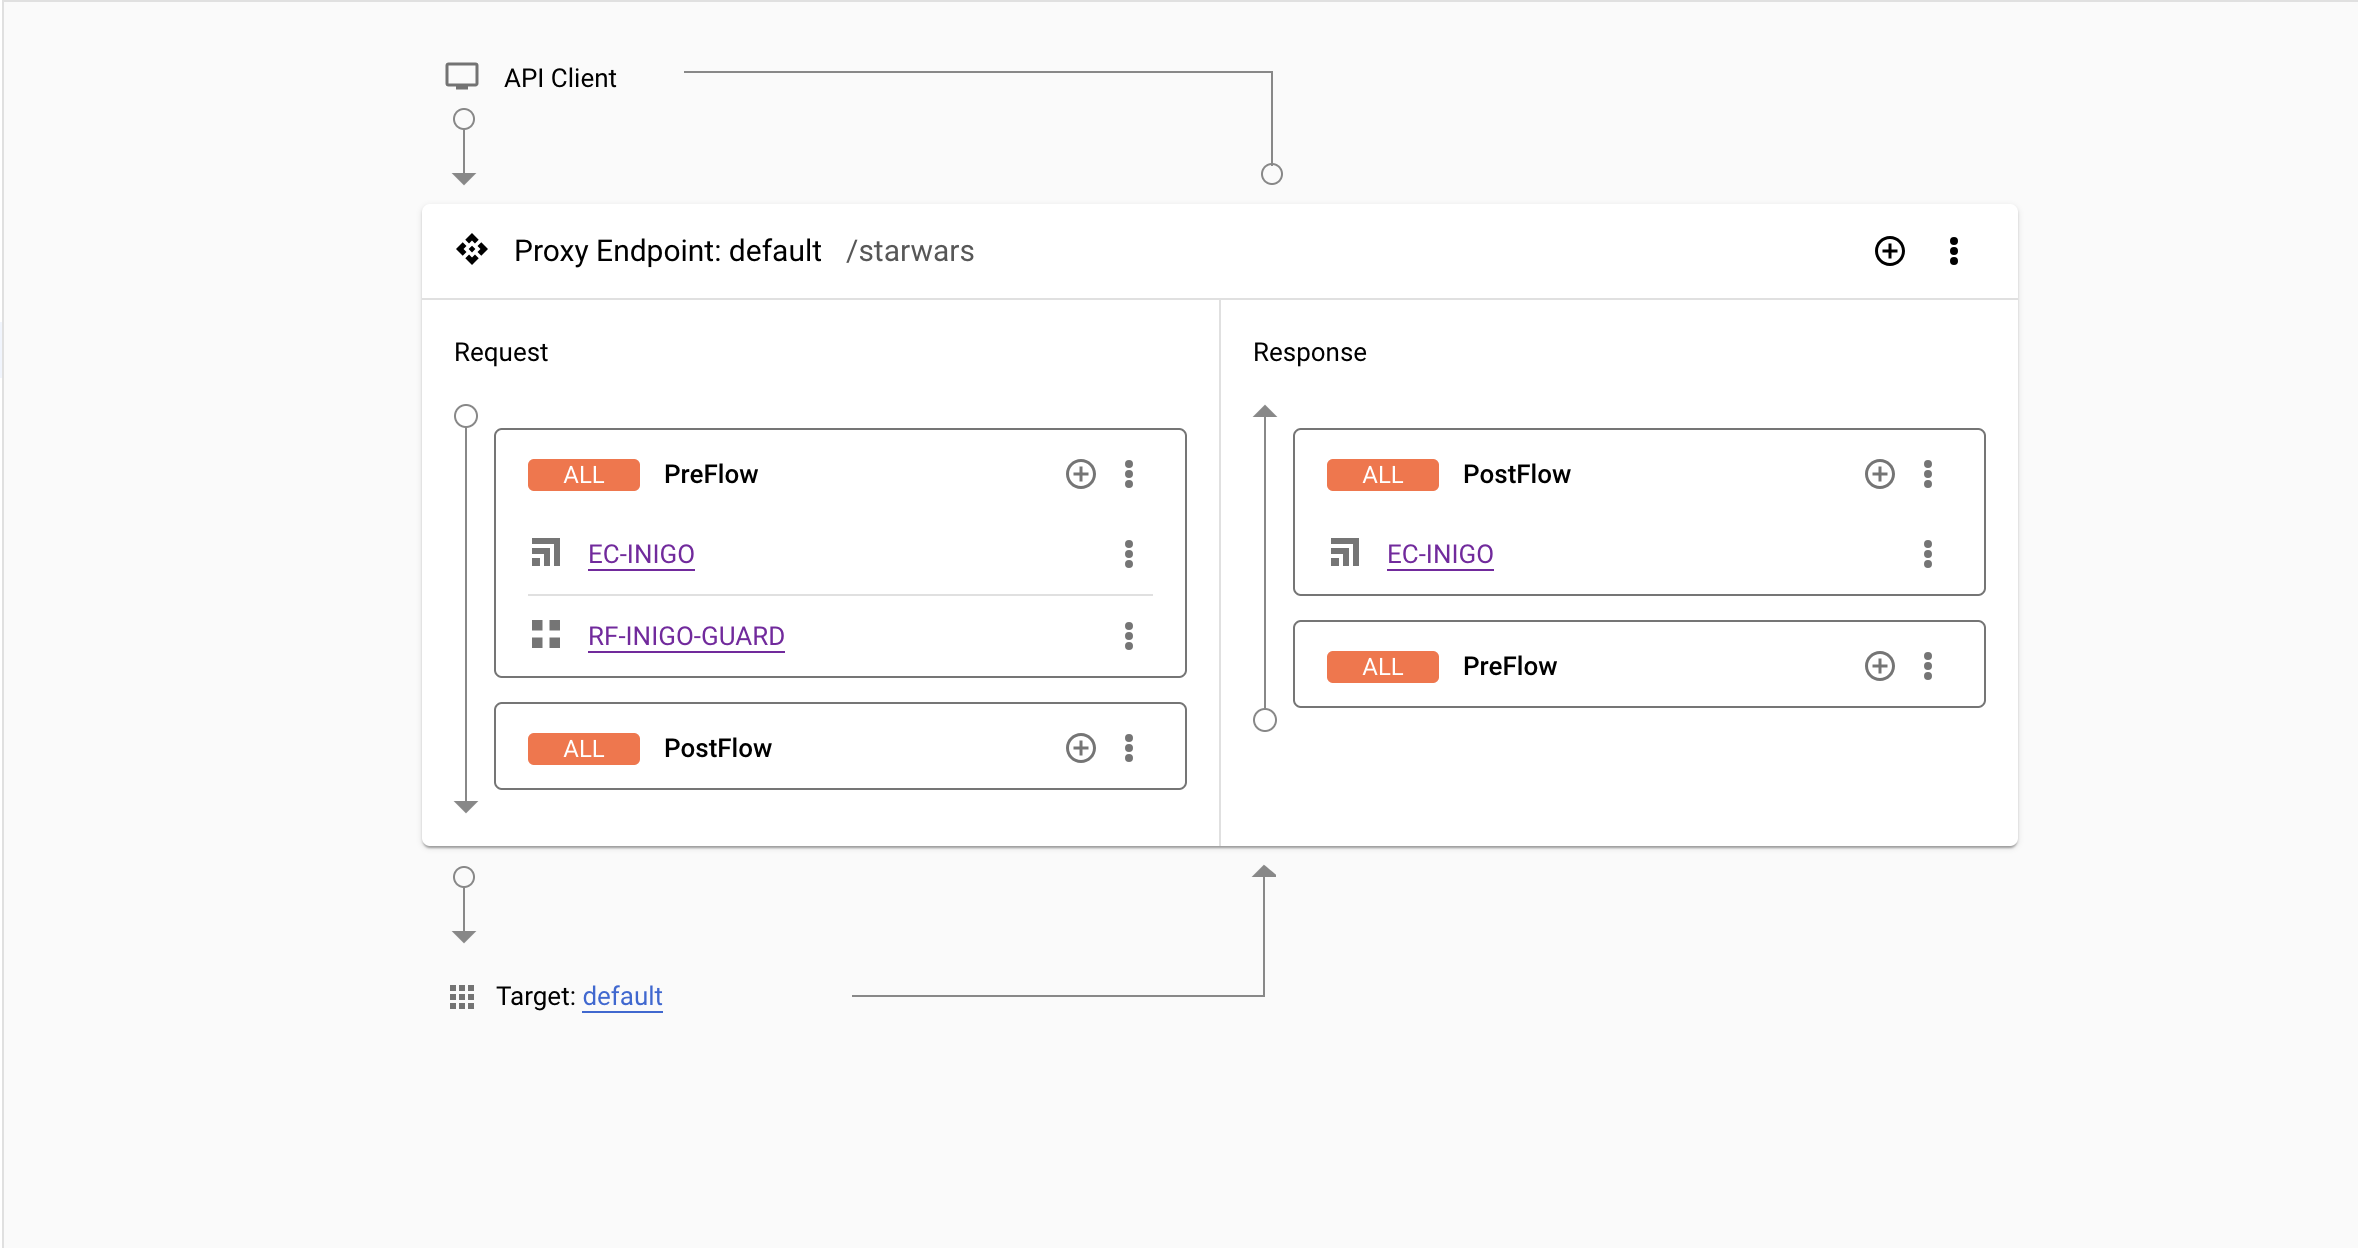
</PreFlow>
After configuring the PreFlow, you will see a representation, as shown in Figure 5.
After clicking Save and Deploy, select the Environment to deploy to. Once the depoyment is completed, the ExternalCallout will be activated, and all GraphQL queries will be observed and secured by the Inigo agent.