Okta SSO Integration
Inigo offers an Okta integration to help you seamlessly integrate your organization's SSO with Inigo's cloud-based service. Once configured, your team will have the ability to authenticate with Inigo via Okta using their existing company account.
Through this integration, you'll leverage Okta's robust identity management capabilities, ensuring secure access control and streamlined user authentication processes within your Inigo environment.
Supported Features
- IdP Initiated Auth Flow: Single Sign-On (SSO) using OpenID Connect (OIDC) initiated via Okta.
- Just-In-Time provisioning.
- SP flow
Requirements
Administrative access to an Okta organization.
App Integration Setup
Your organization's Okta administrator will need to add and complete the Inigo application in your existing Okta account. This integration can be performed without any setup from Inigo, as it's completely self-service, and does not require any configuration.
The application installation can be performed with the following steps:
1. Install the Inigo App
Search for the Inigo app in the Okta applications directory, which is available in your Okta admin UI under Applications, as shown in the following image:
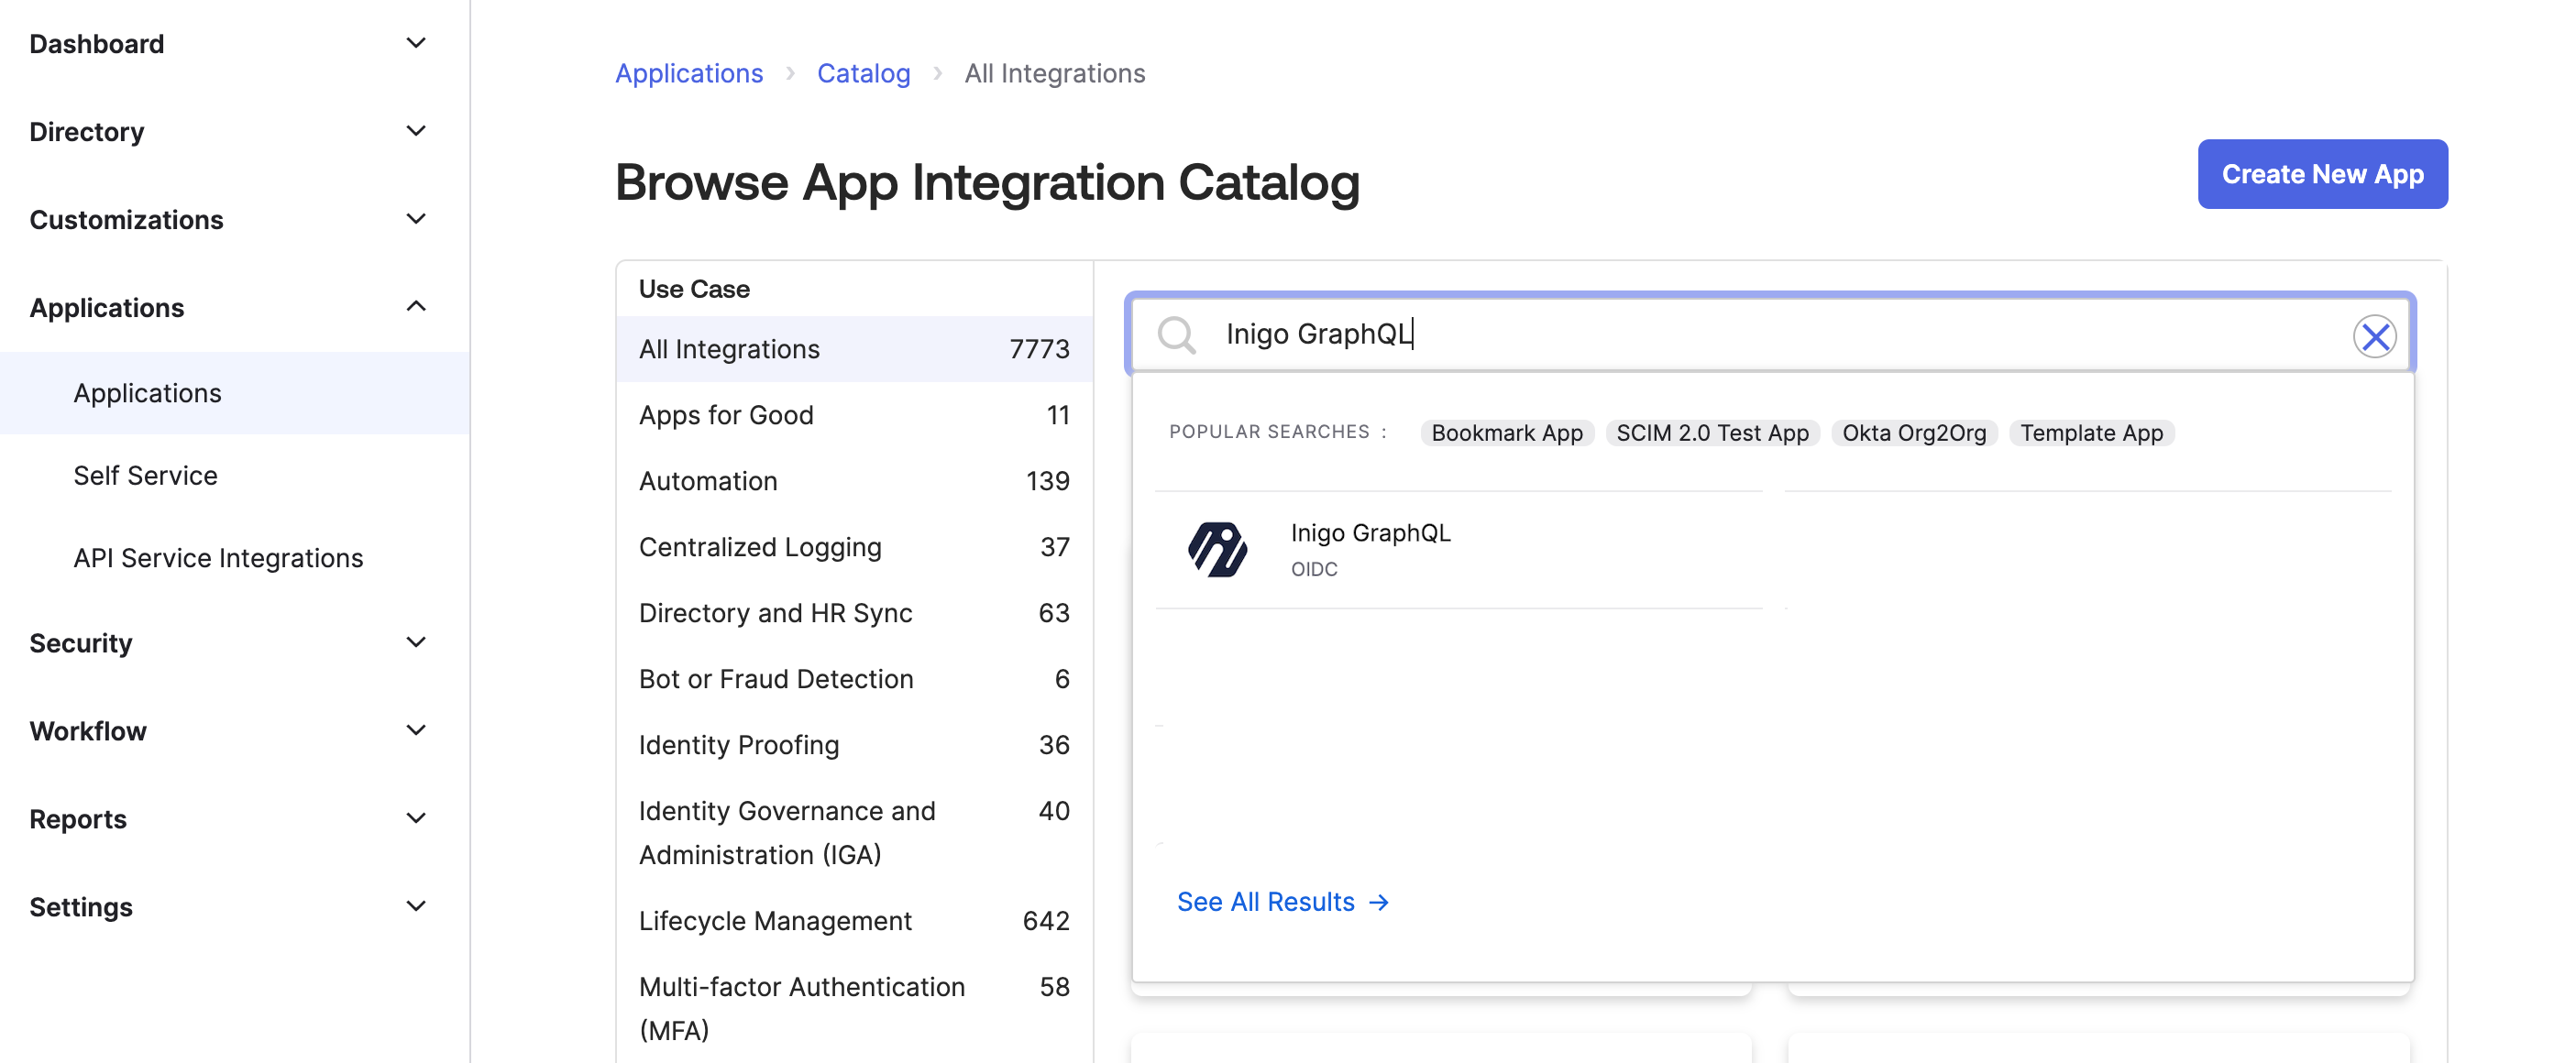
Proceed to install Inigo by clicking the Add Integration button.

2. Assign Inigo Application to Your Okta Users/Groups
After the Inigo App Integration installation is complete, Inigo will be available under Applications. Under the configuration menu, Assign to Users and Assign to Groups will be available.
Assign the Okta integration to users or groups as desired. For example, you may wish to assign Inigo to a Developers Okta group.
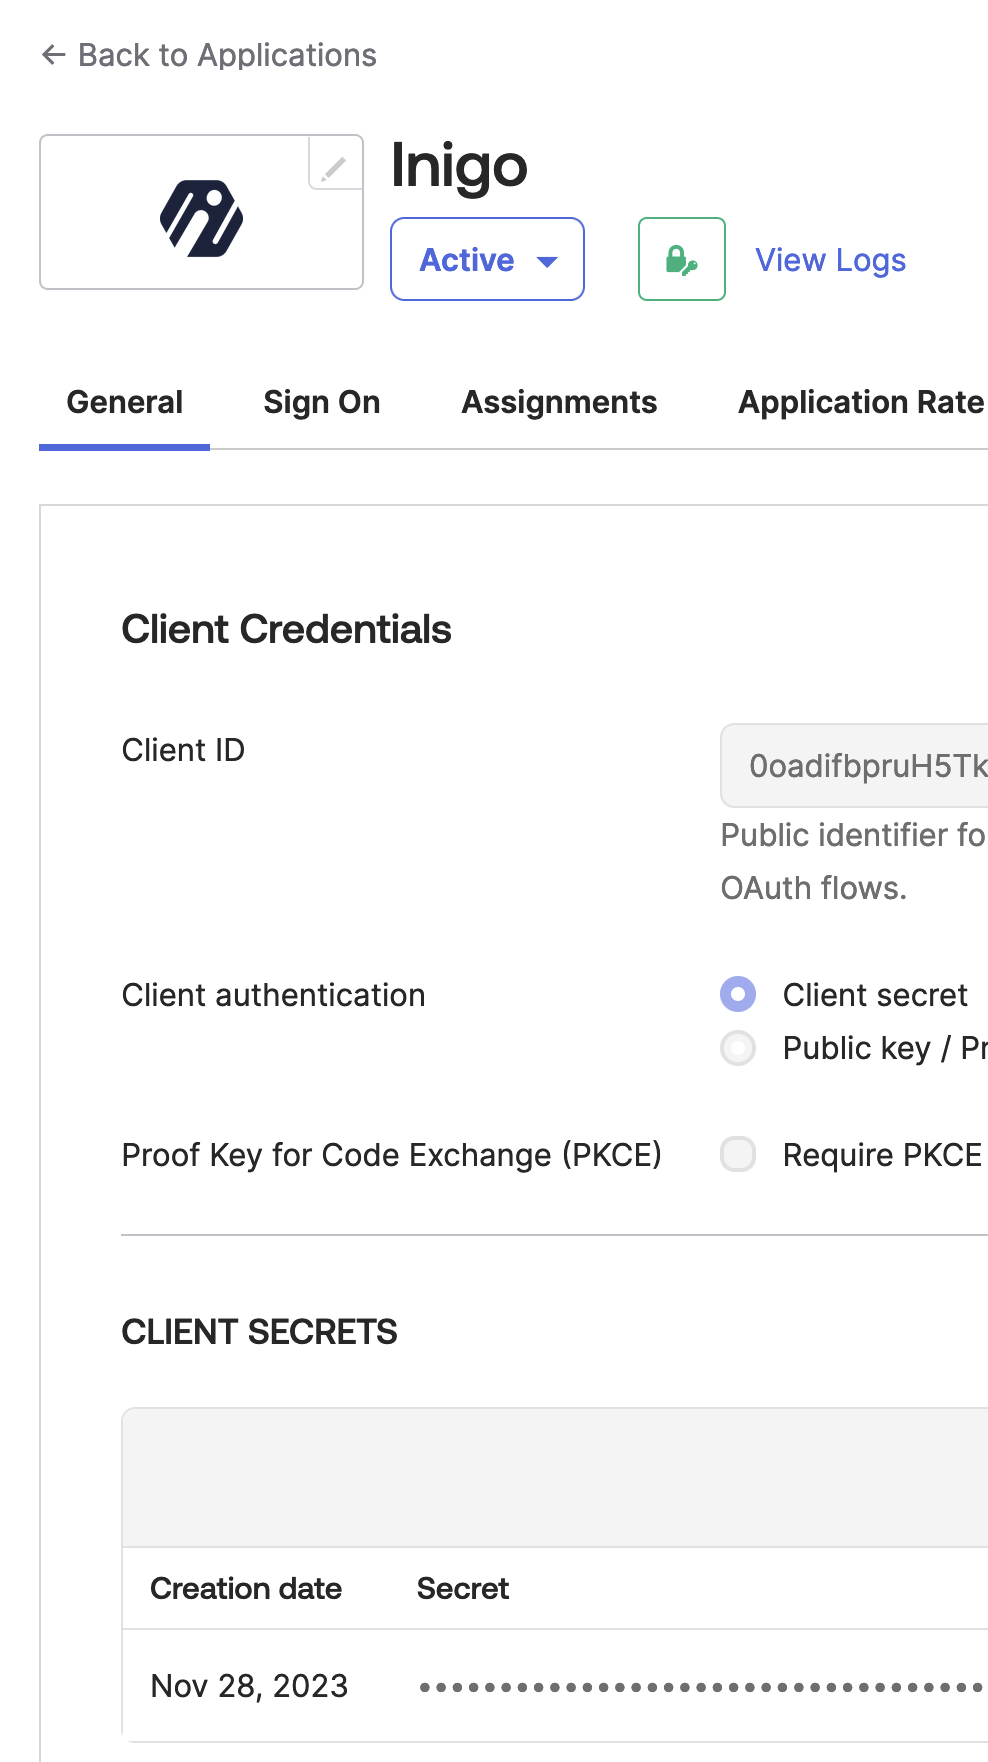
3. Configure Inigo to use Okta IdP
In the Inigo Application:
- Go to the Sign-On tab.
- Note down the Client ID and Client Secret.
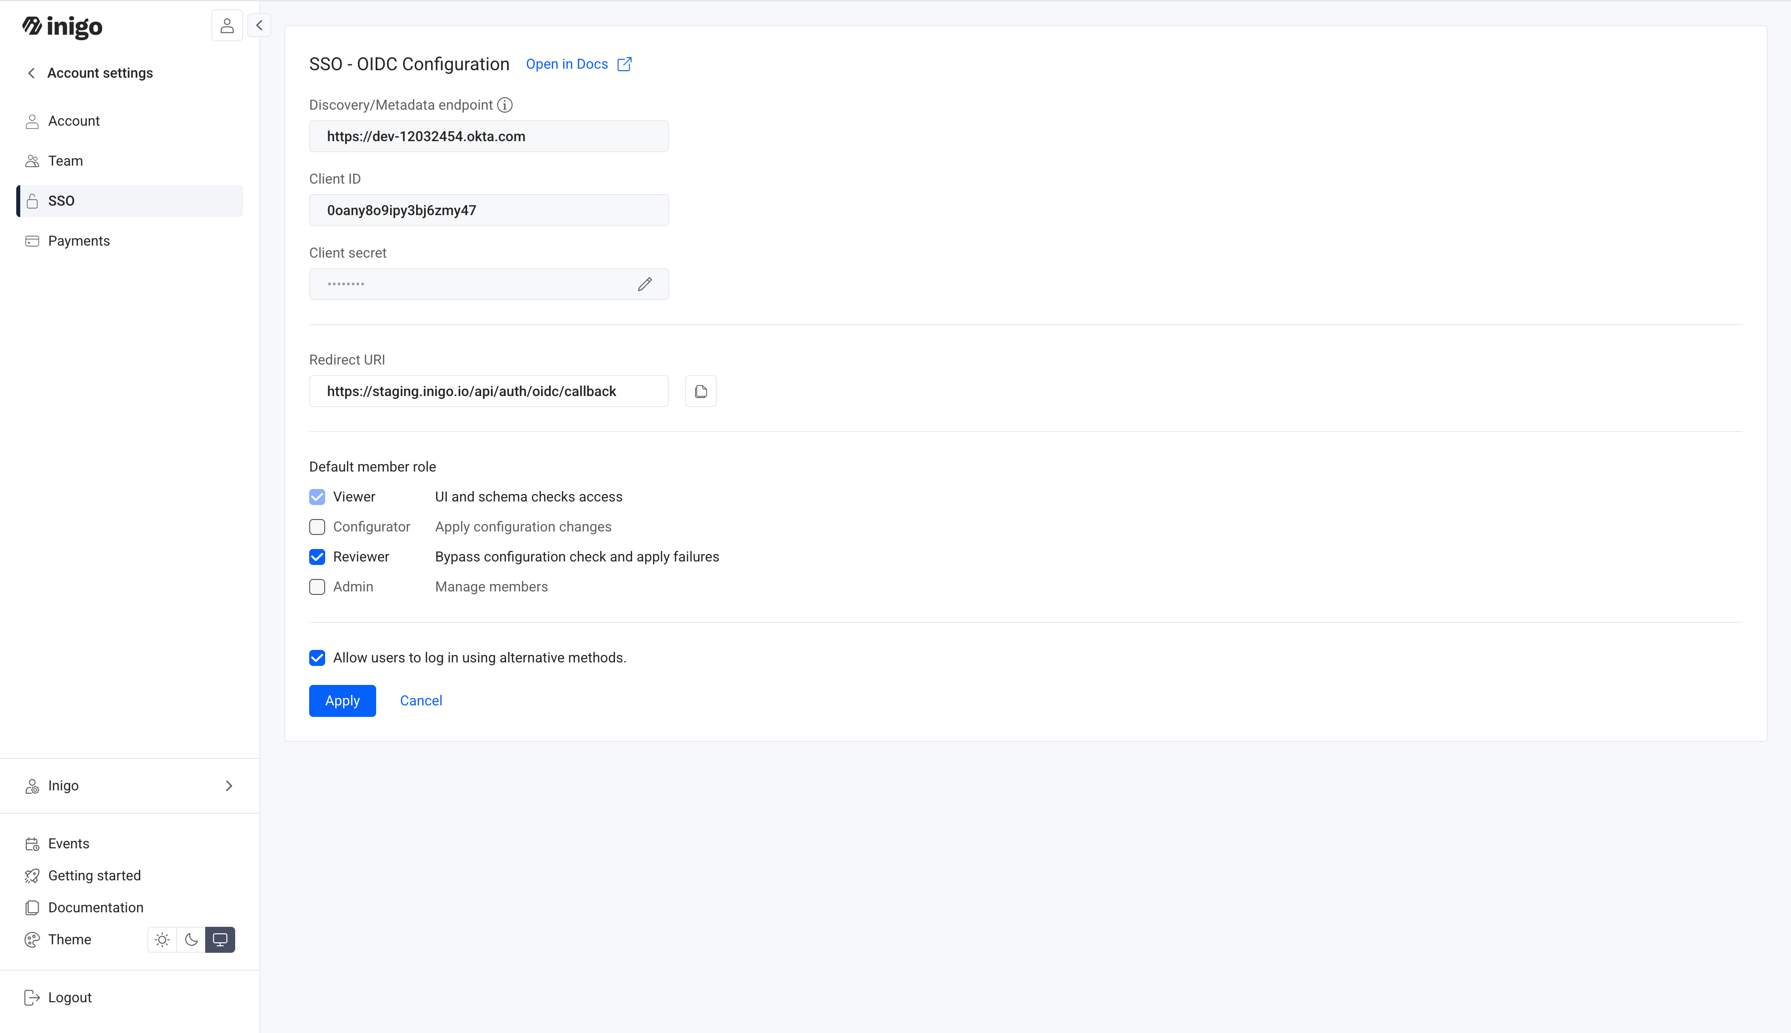
Go to the Inigo Account Settings:
- Navigate to Account Settings > SSO.
- Click Configure.
- Enter OIDC Configuration Details
- Discovery Endpoint: Enter your Okta Account URL
https://<okta-account-id>.okta.com/. - Client ID: Paste the Client ID.
- Client Secret: Paste the Client Secret.
- Save the configuration.
- Discovery Endpoint: Enter your Okta Account URL
User Login Flow
After the Inigo App Integration is installed, and the Users or Groups are assigned, the Inigo app will appear on the Okta user dashboard for those relevant users, as shown in the following image:
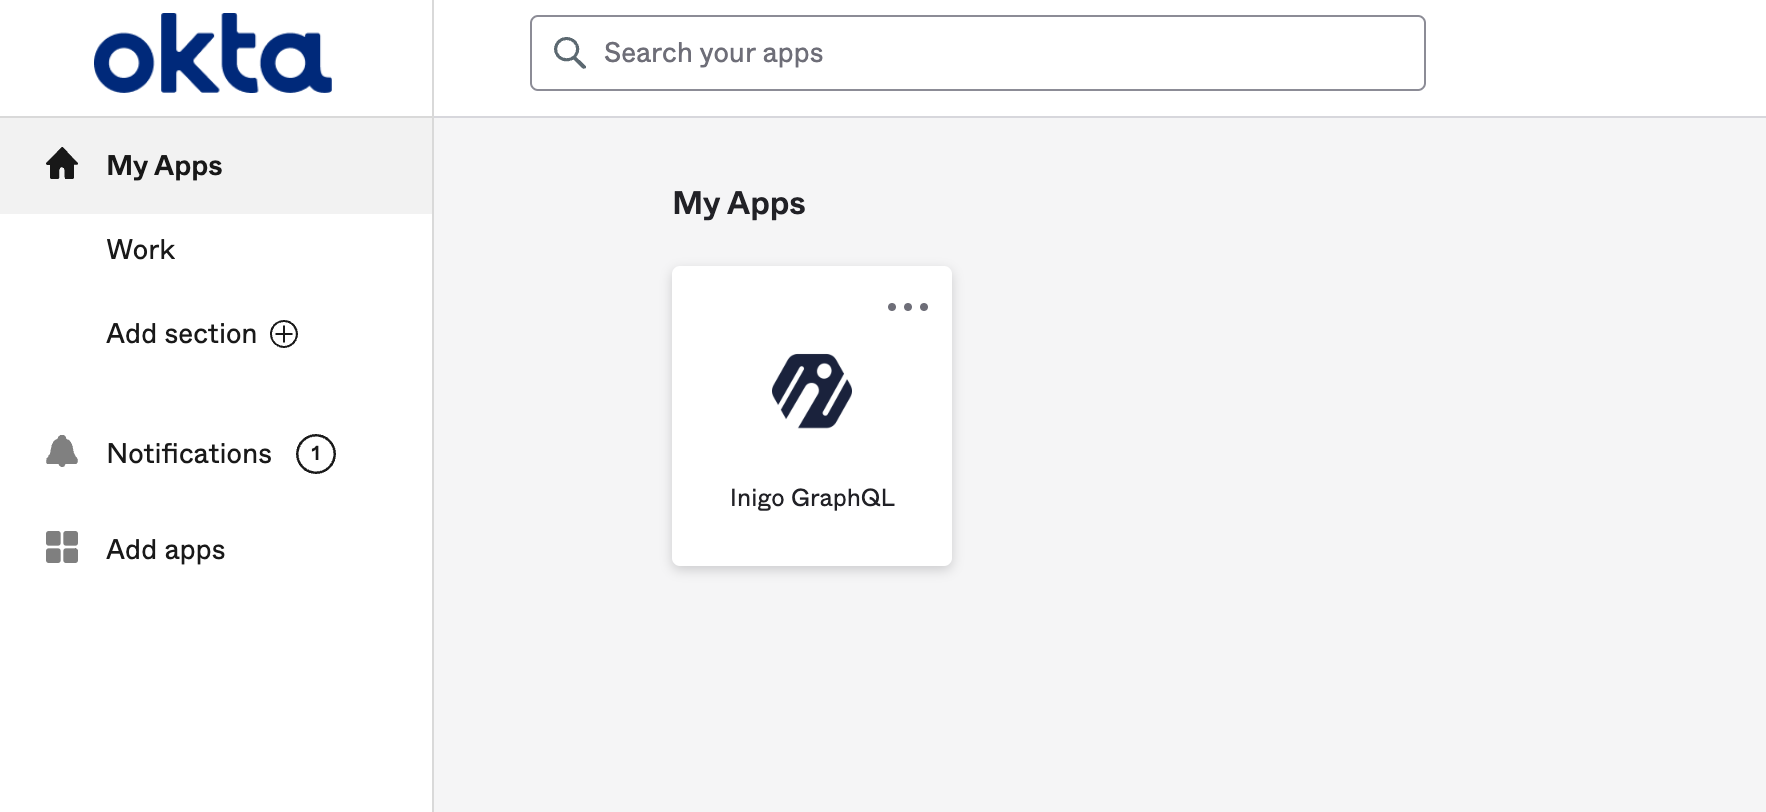
For a user to access Inigo, they must click on the Inigo app icon on the Okta user dashboard. After clicking, the user will be redirected to the Inigo UI and already be authenticated via Okta.
Alternatively, you can use the link, generated for your account to access Inigo via configured OIDC.
To access the link, navigate to Account Settings > SSO.
For further assistance, please reach out to our support team at [email protected] or through Slack.