Microsoft Entra
Integrating Inigo with Microsoft Entra ID (Azure AD)
Inigo supports authentication via Microsoft Entra ID (Azure AD) using OpenID Connect (OIDC). This guide will walk you through the steps to configure Microsoft Entra ID as your identity provider for seamless Single Sign-On (SSO) integration with Inigo.
Prerequisites
Before configuring Inigo with Microsoft Entra ID, ensure you have:
- Administrator access (Application Administrator role) to your Microsoft Entra ID (Azure AD) tenant.
- Admin access to your Inigo account.
Step 1: Register Inigo as an Application in Microsoft Entra ID
- Register Client Application
- Go to Microsoft Entra Admin Center.
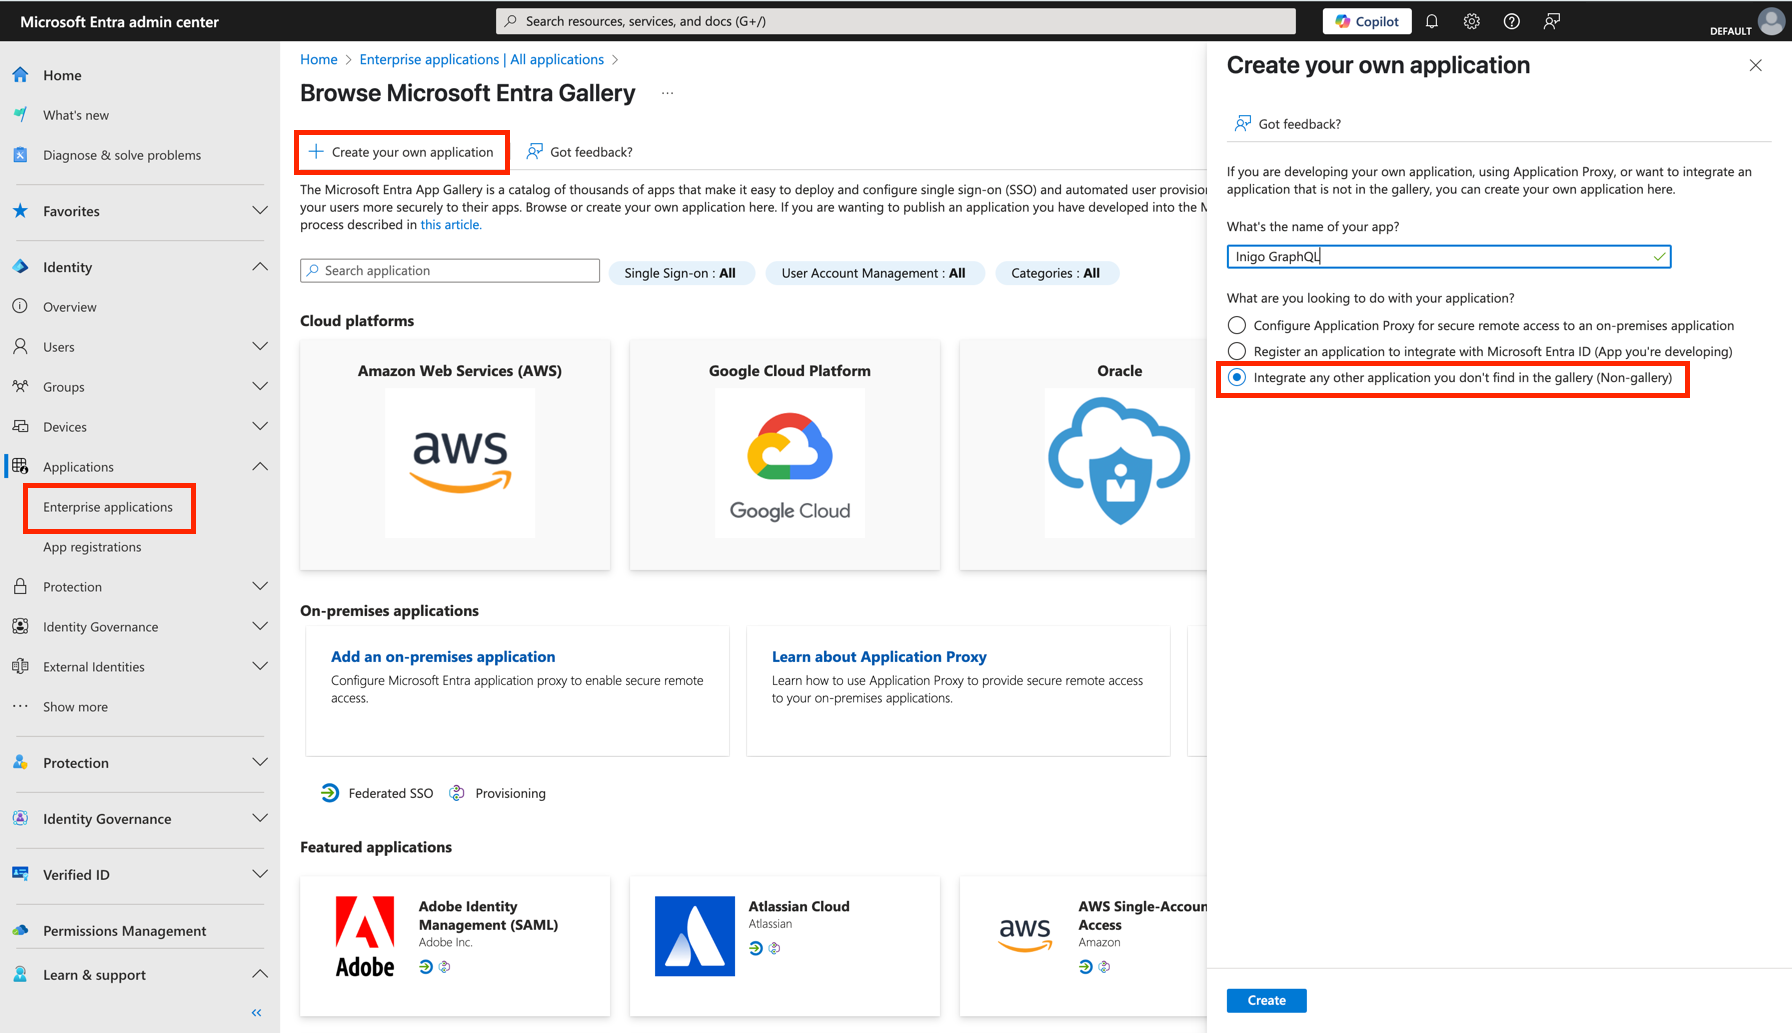
- Select Applications > Enterprise applications > New application > Create your own application
- Give it a name
- For the What are you looking to do with your application? question, put the Non-gallery* option, as it's on the image.
- Click Create
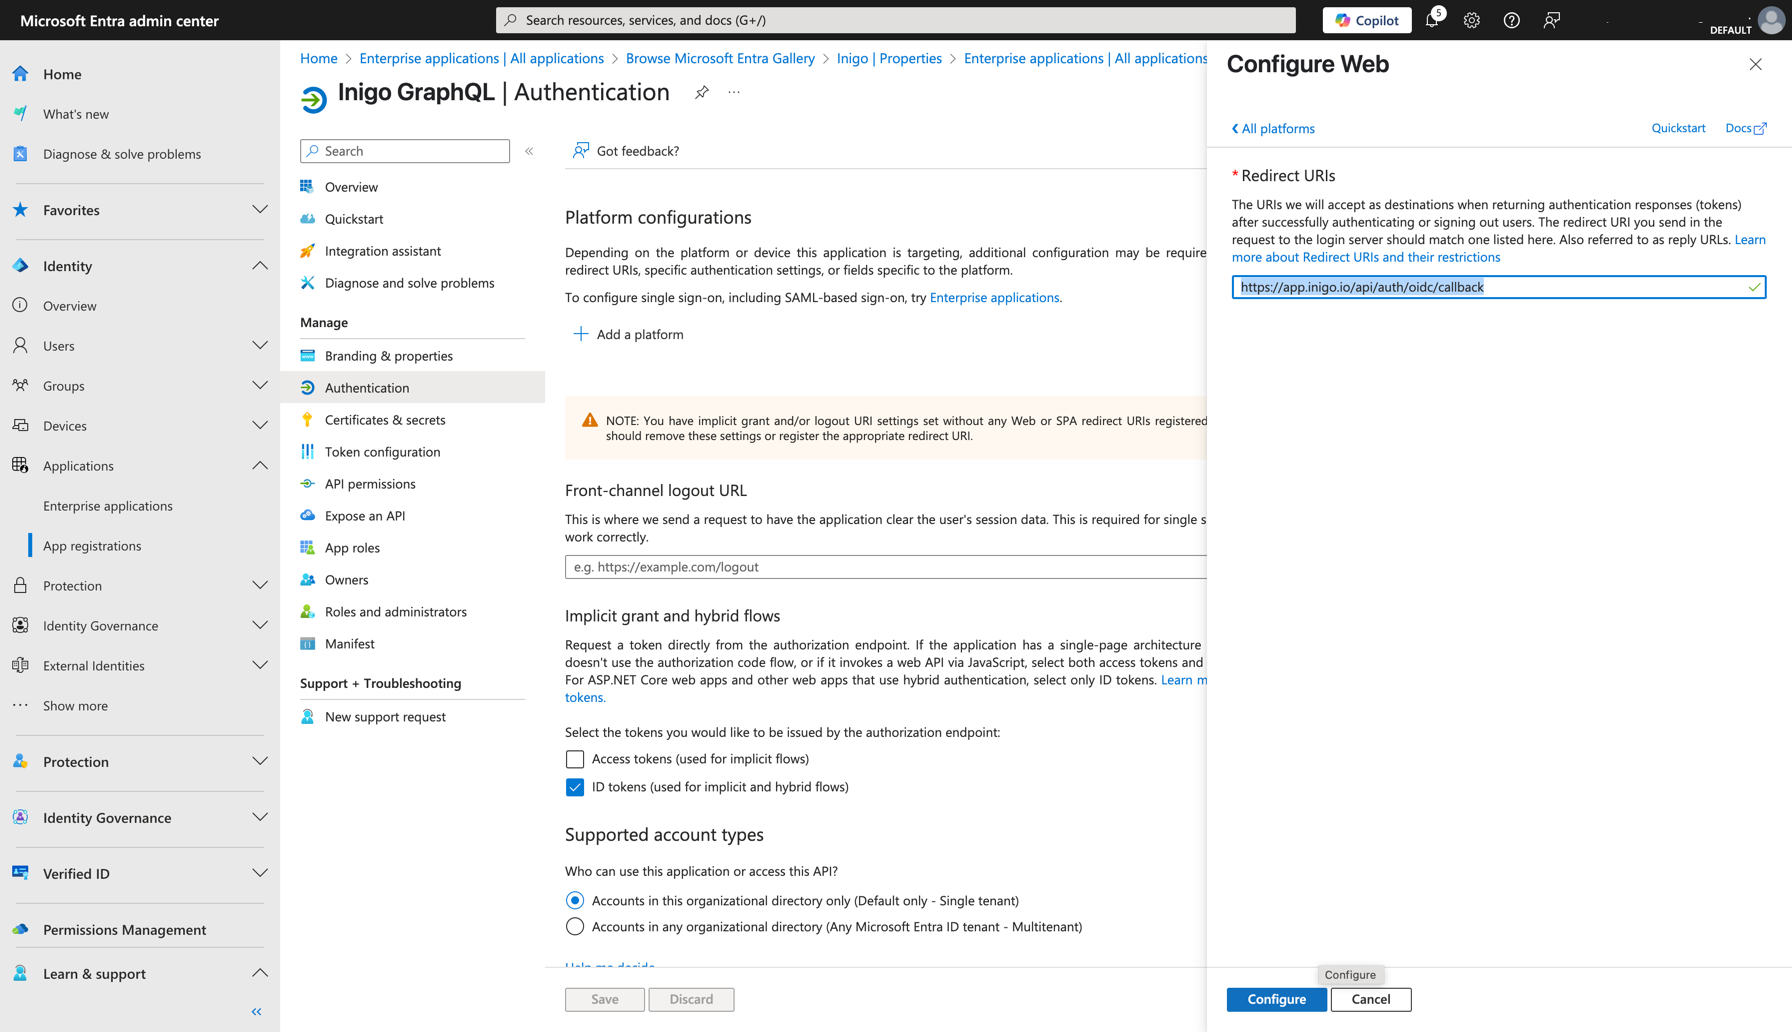
- Configure Redirect URI
- Navigate to Applications > App Registrations > All applications.
- Select newly create App Registration.
- Click Add a Redirect URI
- Click Add a Platform
- Select Web
- Put value
https://app.inigo.io/api/auth/oidc/callback - Click Configure
Being on your new App Registration page:
- Go to Branding & Properties.
- Select Upload new logo.
- Use Inigo Logo!
For the configuration on the Inigo side, you will need the following three values: Discovery Endpoint, Client ID, and Client Secret. Let's retrieve these values before proceeding with the Inigo setup.
-
Find Client ID
- Go to Overview page of you App Registration.
- Find Client ID under
Application (client) IDlabel. - Copy an put it aside.
-
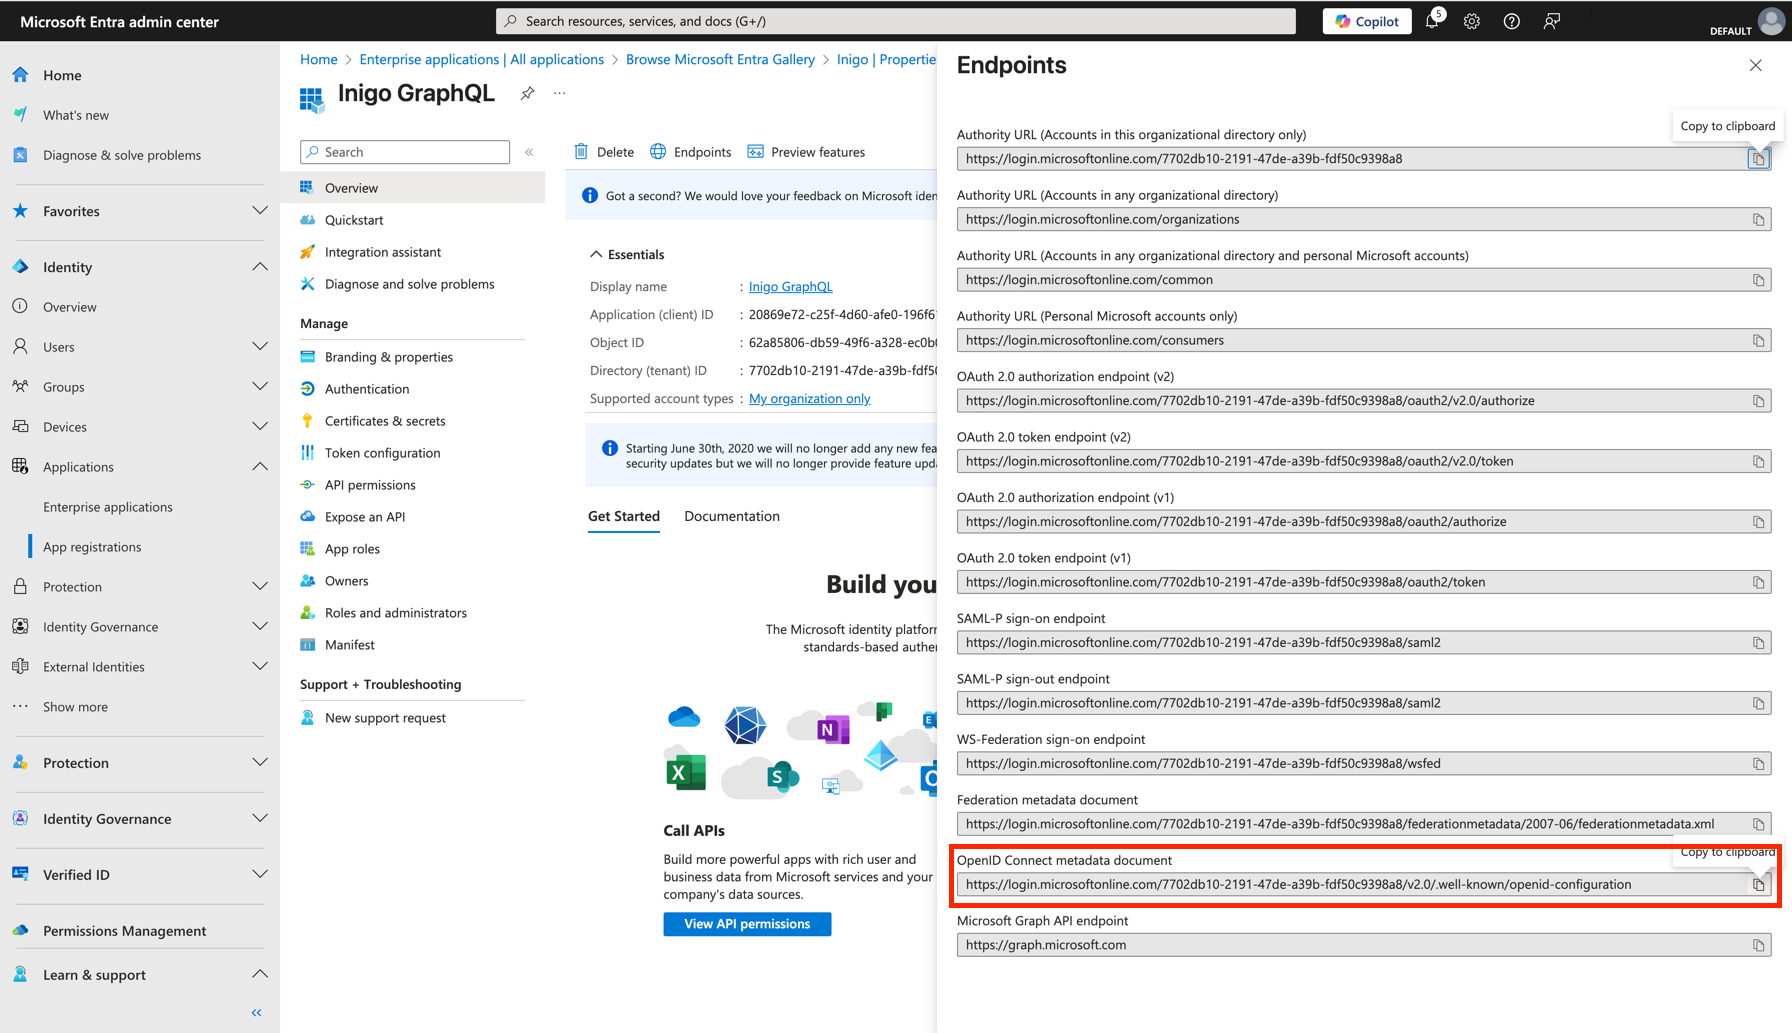
Find Discovery Endpoint
- Go to Overview page of you App Registration, then click on Endpoints.
- Copy OpenID Connect metadata document URI.
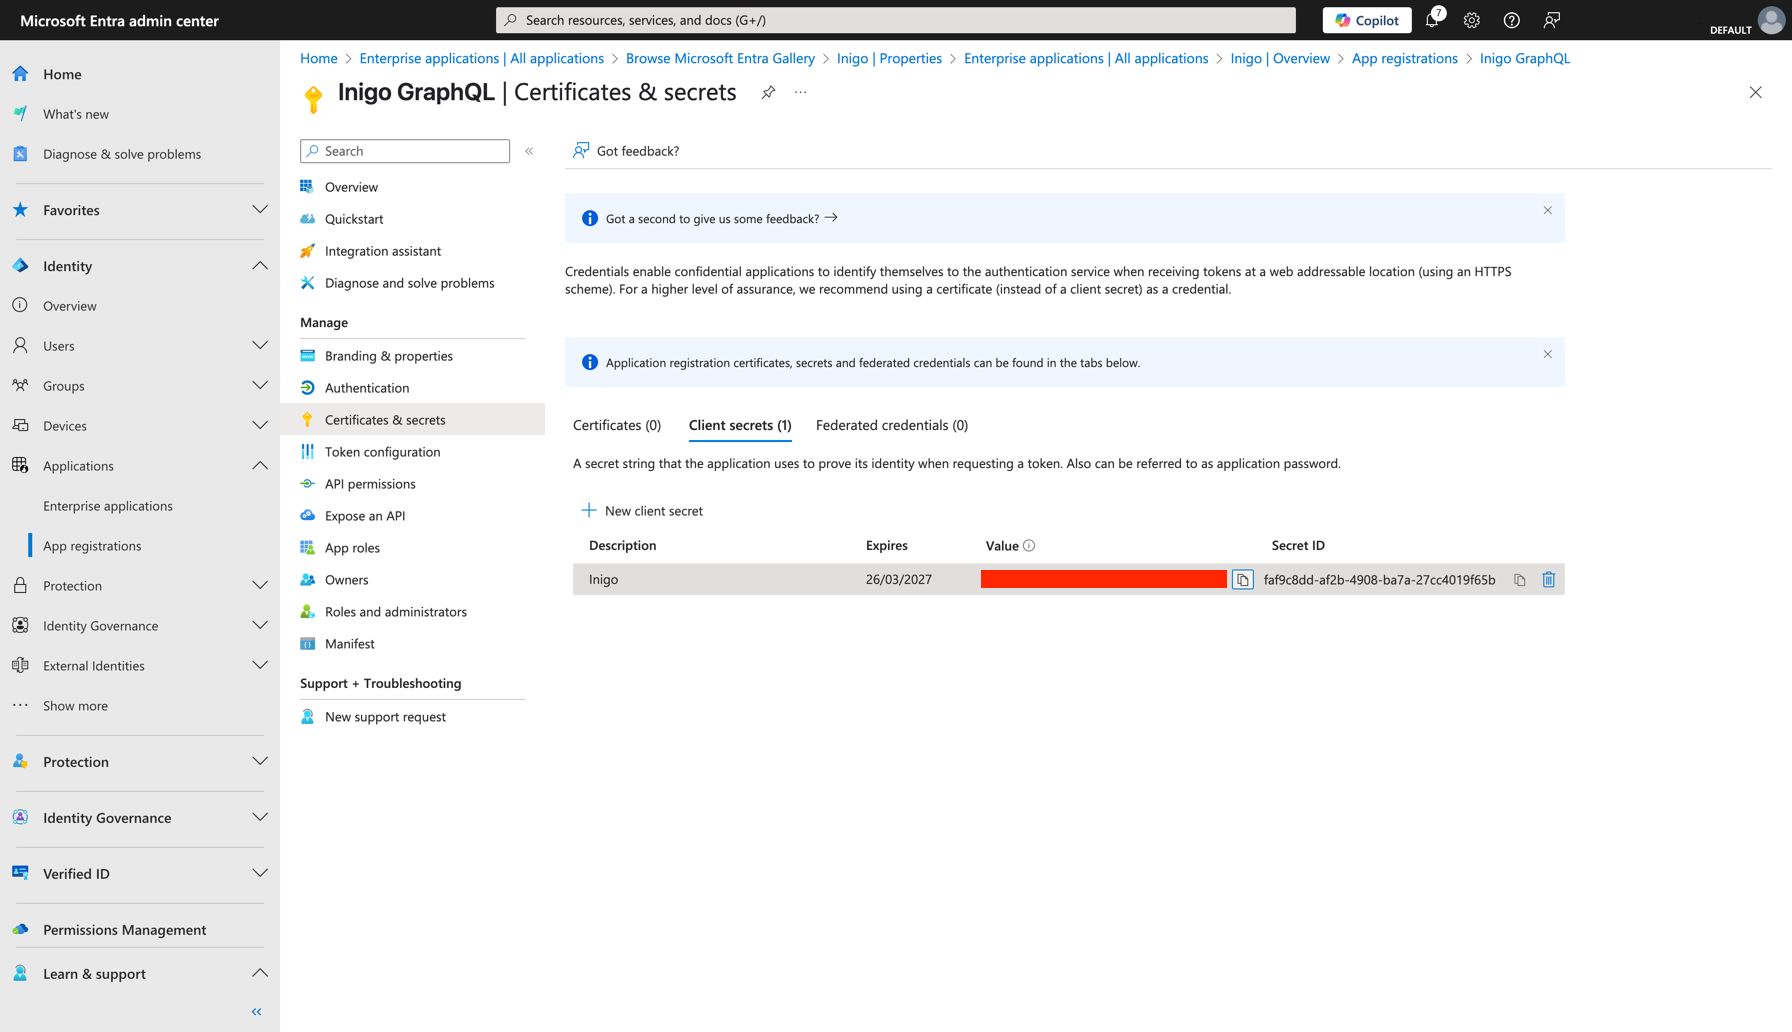
- Create a Secret
- Go to In your App Registration, navigate to Certificates & Secrets.
- Click New Client Secret, give it a description and click Create.
- Save the newly created secret’s value, you’ll need it later.
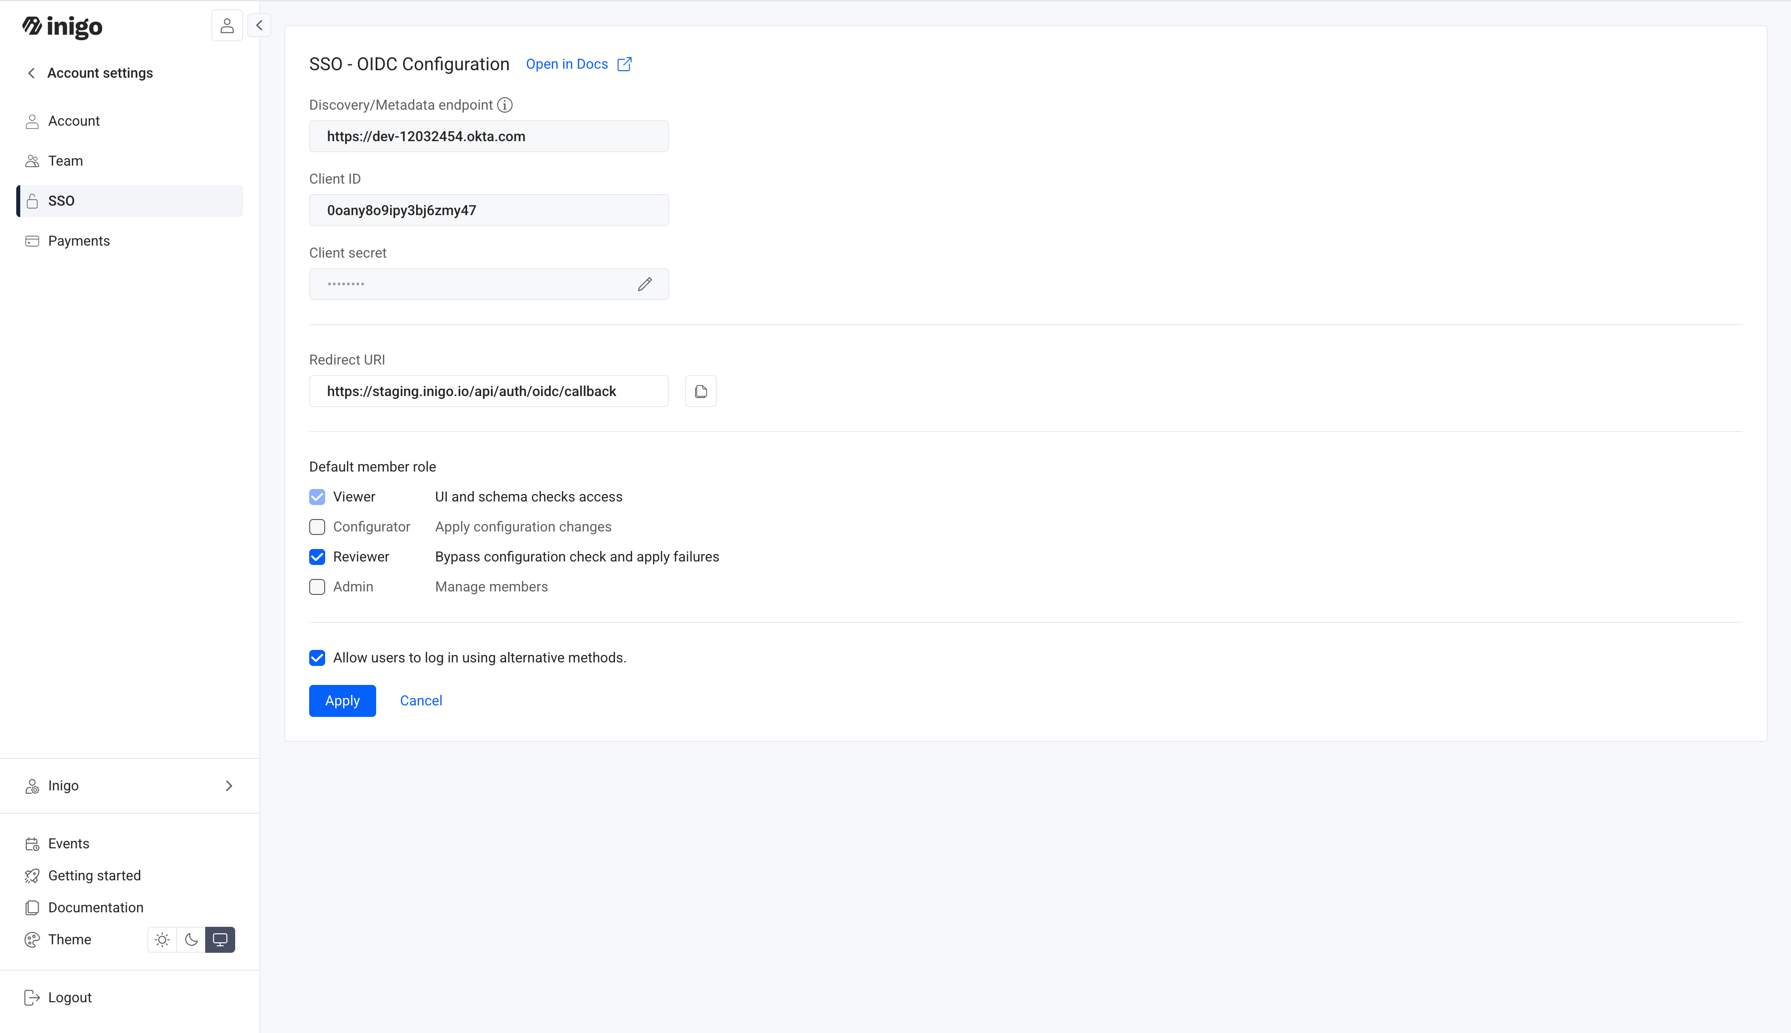
Step 2: Configure OIDC in Inigo
- Go to the Inigo Account Settings
- Navigate to Account Settings > SSO.
- Click Configure.
- Enter OIDC Configuration Details
- Discovery Endpoint: Enter the Discovery Endpoint we have from the previous step.
- Client ID: Paste the Client ID.
- Client Secret: Paste the Client Secret.
- Save the configuration.
Step 3: Use Login URL
Inigo provides a unique Login URL for your organization, which you can use to access your account via Microsoft Entra ID. Additionally, you can configure Microsoft to allow logging into Inigo directly. Follow these steps:
- Go to Microsoft Entra Admin Center.
- Select Applications > Enterprise applications and pick your new Inigo app.
- Select Set up single sign on > Linked
- Configure to use your generated Login URL.
The app shortcut should appear in https://myapplications.microsoft.com/ shortly.
Once completed, your users can log in to Inigo using Microsoft Entra ID, benefiting from secure and centralized authentication management.