GraphQL Playground (Explorer)
Inigo has a GraphQL Playground called Explorer that provides a full-featured GraphQL IDE in the browser. Explorer offers the following features:
- Query schema navigation
- Query validation
- Query execution history
- Auto-insertion of variables from a query
- Pre-flight scripts
- Query collections with the ability to save and share queries
Also, Explorer offers some unique capabilities:
- Integrated observability, including real-time metrics and traces
- Single interface for both supergraphs and subgraphs
- Tight integration makes exploration of GraphQL data from Explorer easy
- Works with any GraphQL gateway or server
The first step in using Explorer is to create an Inigo Service and a GraphQL server or gateway connected to Inigo. After the Service is ready and your GraphQL server or gateway is connected to Inigo, you can explore its features on the Explorer tab.
In Explorer, the Connection Settings must be configured before continuing. Click the Gear icon for Connection Settings and paste in the URL to your GraphQL server, and a remote or local server will work, such as http://localhost:4000
Explorer can be used with a GraphQL service not connected to Inigo, but you will lose the benefits of Analytics and Tracing.
Build a Query with Validation
Once a GraphQL server or gateway is connected and the Connection Settings are set up, Explorer will automatically provide the schema in the lefthand pane. Using this schema, a query can be built by checking and unchecking fields. This makes it quicker and easier to build a GraphQL query from scratch.
Additionally, auto-complete with a popup menu is also available as one types in the editor, as shown in Figure 1. Also the query will be continuously validated during editing.
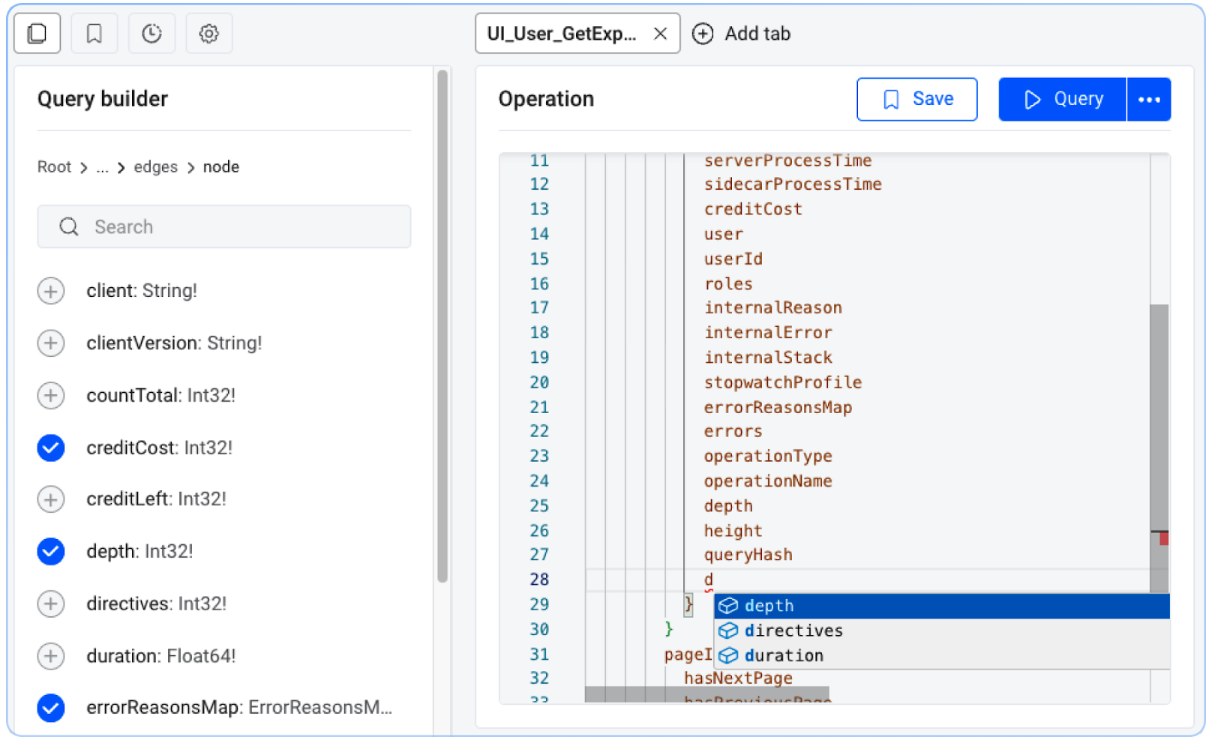
Figure 1. Query builder.
Auto-Insertion of Variables
If an operation requires variables, Explorer will automatically add the variables you need to the Variables section. The values can then be populuted as desired and saves the manual copying and pasting of the variables from the query.
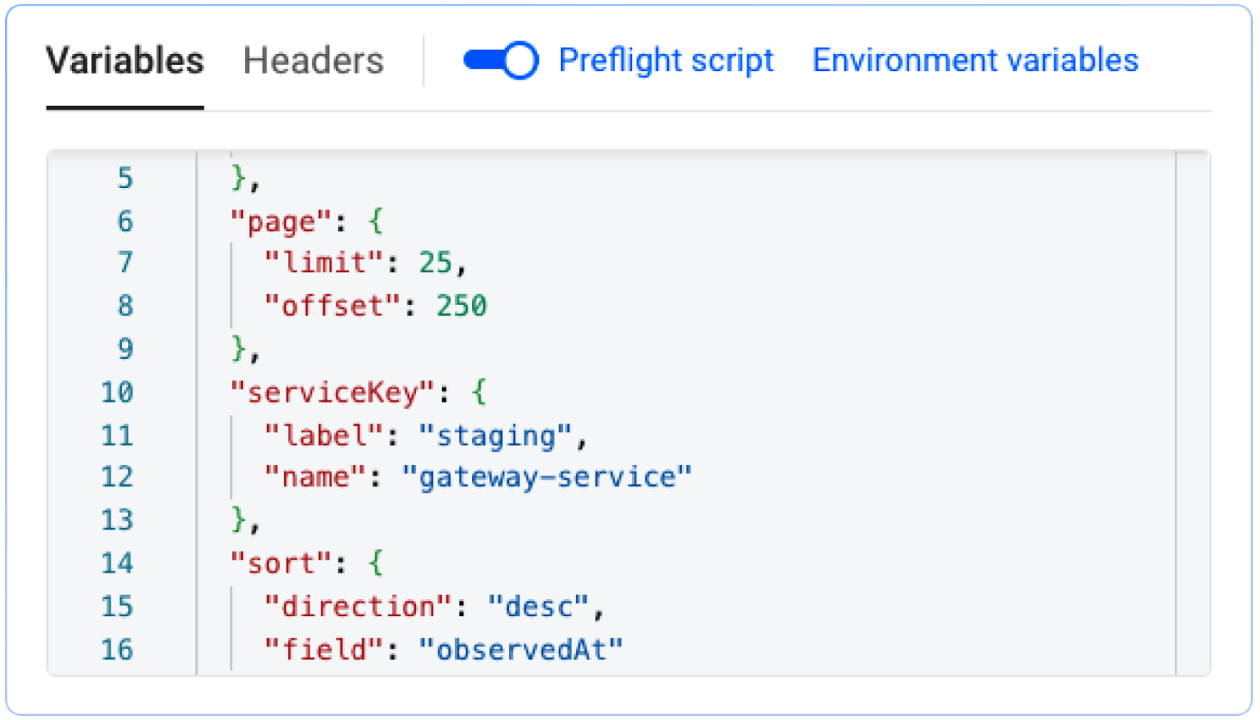
Figure 2. Variables.
Query Collections
Having a core set of GraphQL queries that is needed for testing or debugging purposes is common. Explorer lets one create Collections of queries that are saved and organized for persistent use, as shown in Figure 3.
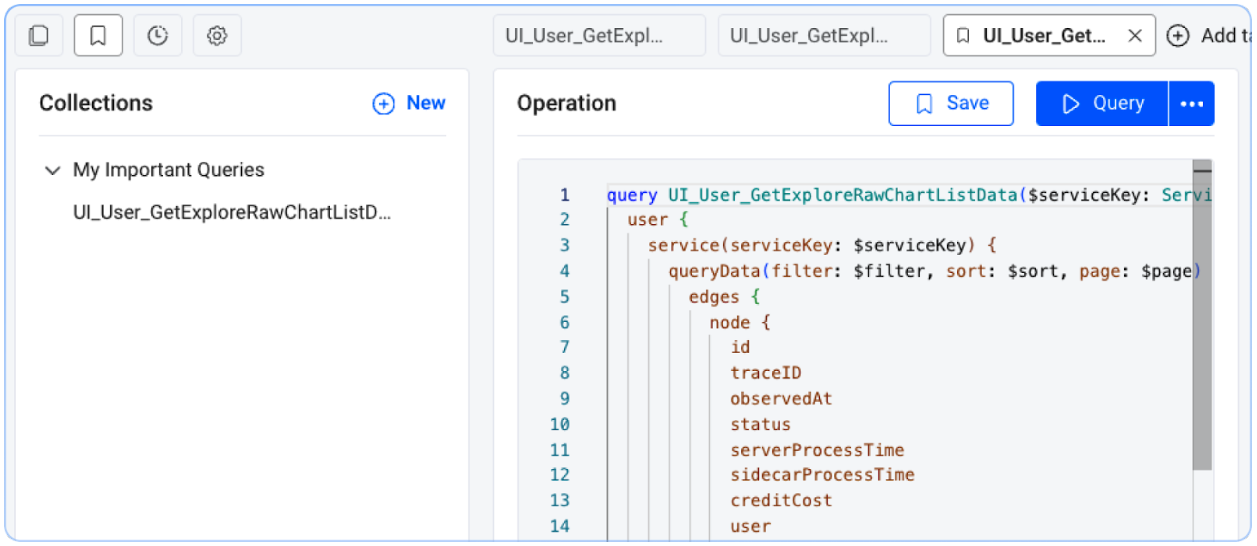
Figure 3. Query Collections.
Query Execution History
Explorer will maintain a history of queries and the resulting responses, as shown in Figure 4. This data is stored locally in your browser, not in Inigo, so potentially sensitive data from the responses is not stored in the cloud. There is also the ability to repeatedly execute a query from the History again.
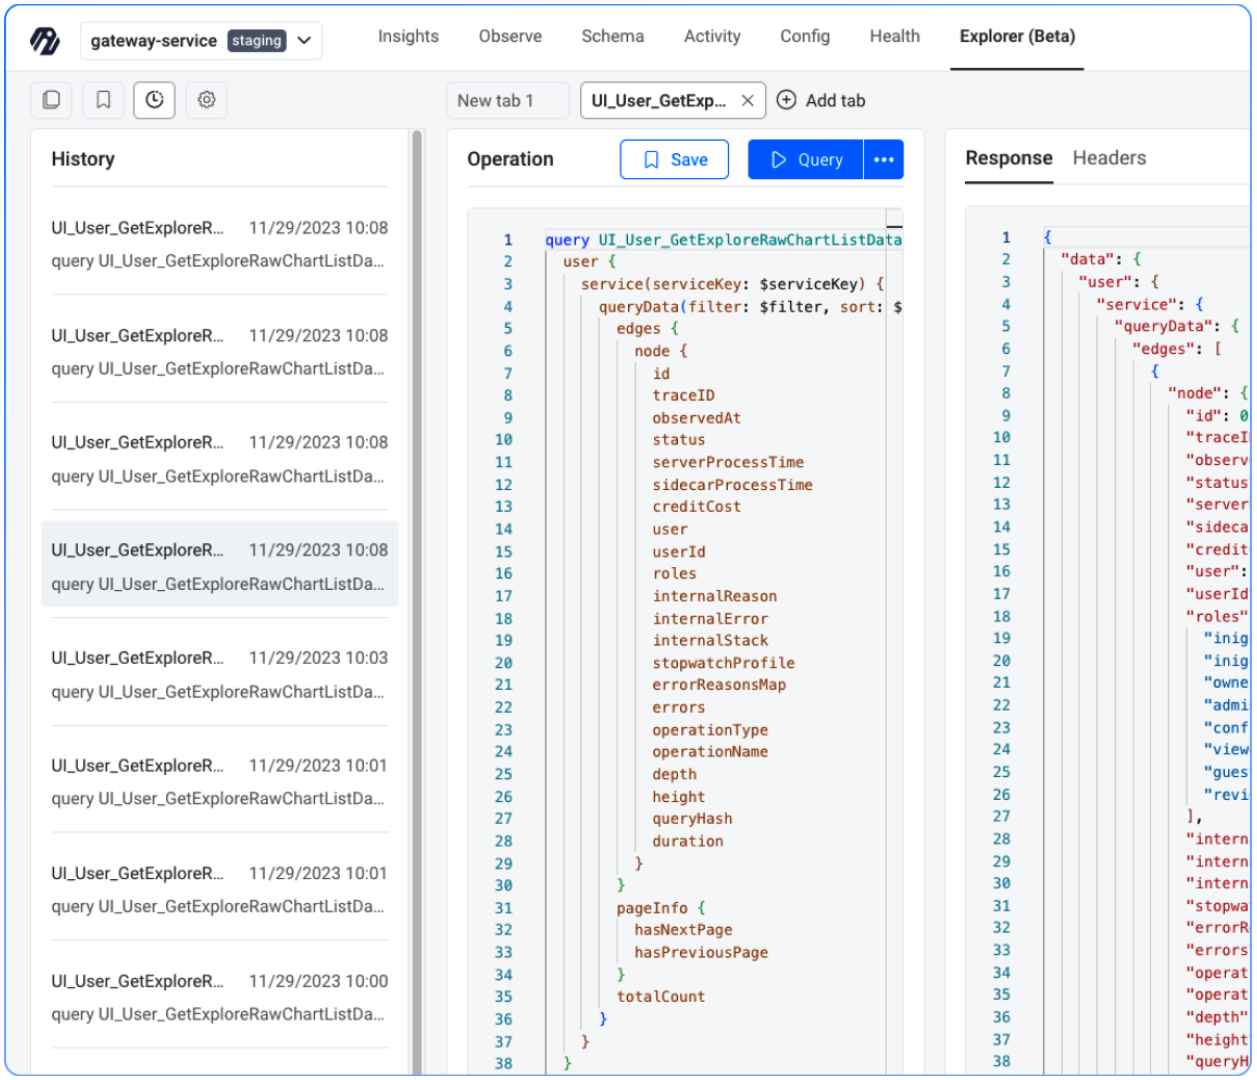
Figure 4. Query Execution History.
Preflight Script
If the GraphQL endpoint used in Explorer is secured by an authentication mechanism, such as a username/password flow that returns a JWT token, a pre-flight script can be implemented to successfully run authenticated queries in Explorer.
As an alternative to using a preflight script, a token value could be created outside of Explorer and then set as a hard-coded header value.
For the case where an authentication flow must be implemented, you may implement your own login script. The following example schema snippet will be the basis of the pre-flight script example in this document:
type Query {
  """
  Returns the JWT token string value upon successful login.
  """
  login(email: String!, password: String!): String
  ...
}

type User {
  id: ID!
  ...
}
A custom authentication implementation can be created using plain JavaScript code. You will use the JavaScript fetch API to call an authentication endpoint.
Check your authentication provider's docs on how this may be done. You will also need to implement a JavaScript function to decode a JWT token in the preflight script.
An example would be retrieving the exp (expiration time) so you can check if the token is expired or not.
The following script uses the built-in inigo object to complete a few functions which are:
inigo.environmentto get/set environment variablesinigo.inputto capture user input (i.e. username/password)inigo.fetcherfor an easy way to issue GraphQL queries that might be used for things like logging in
The following script checks for an existing JWT token in the user session, and if it does not exist, will make a call to the login query as shown in the schema snippet:
const token = inigo.environment.get('token');

if (token) {
  const tokenVerifyResponse = await inigo.fetcher({
    query: `
      query ExplorerPreflightTokenVerify {
        user {
          id
        }
      }
    `,
    headers: {
      Authorization: `Bearer ${token}`
    }
  });

  const { data: tokenVerifyData } = await tokenVerifyResponse.json();

  if (tokenVerifyData?.user?.id) {
    return;
  }
}

const { email, password } = await inigo.input(['email', 'password']);

if (email && password) {
  const tokenResponse = await inigo.fetcher({
    query: `
      query ExplorerPreflightLogin($email: String!, $password: String!) {
        login(email: $email, password: $password)
      }
    `,
    variables: {
      email,
      password
    }
  });

  const { data: tokenData } = await tokenResponse.json();

  if (tokenData?.login) {
    inigo.environment.set('token', tokenData.login);
  }
}
This example JavaScript may be a starting point for one to customize for their own GraphQL API for login purposes, or one can choose to integrate with a 3rd party authentication provider using pure JavaScript code.
Environment Variables
From the example, a token is set from the JavaScript code. However, a token value could also be set manually in the Environment Variables section of Explorer, as shown in this example:
{
  "token": "eyJhbGciOiJIUzUxMiIsInR5cCI6IkpXVCJ9...
}
Headers
Once an environment variable is set, it will likely be used as an HTTP header. For a JWT token, the Authorization header would be set as shown in the following example:
{
  "Authorization": "Bearer {{token}}"
}